
I learned to sew on my grandmother’s machine, a heavy Singer that hummed like a refrigerator and forgave nothing. But before she ever let me near the pedal, she made me learn hand stitches. Ten-year-old me considered this hazing. It was not hazing. Twenty years later I reach for a hand needle almost every single week, and I can always spot the sewists who skipped this step. Their hems peek out, their linings flip to the outside, their buttons dangle by a thread. Hand sewing is not a quaint bonus skill. It is the quiet difference between something that looks homemade and something that looks handmade.
Here is the good news: you do not need thirty stitches. You need six. Six stitches cover nearly everything hand sewing will ever ask of you: basting, seaming, hemming, edge finishing, repairs, and closures. Learn them in this order, give each one ten honest minutes of practice, and no pattern instruction will ever scare you again.

Before the first stitch: needle, thread, and the knot
Hand sewing asks very little of your wallet and a little more of your patience. Start with sharps needles in sizes 7 to 9, which handle most garment fabrics without leaving visible holes. Keep a few larger darners around for heavy fabric and a few fine betweens for delicate work. A tomato pincushion is traditional. Any pincushion you will actually use is correct.
Thread matters more than beginners expect, and I have opinions about it, which you will hear in full below. For now: use an all-purpose polyester thread or a cotton-wrapped polyester for general hand sewing. Match the thread to your fabric in weight, not just color. Heavy upholstery thread on voile will chew it up. Fine silk thread on denim will snap and make you question your life choices.
Cut your thread about the length from your fingertips to your elbow, roughly eighteen inches. Longer thread tangles, shorter thread means constant rethreading, and eighteen inches is the sweet spot generations of sewists landed on through pure suffering. Thread the needle, pull the tail through, and tie a quilter’s knot: wrap the thread around the needle three times, slide the wraps down to the fabric, and pull tight. It makes a small, tidy knot that does not pull through most fabrics.
The six hand stitches every sewist needs
Learn these in order. Each one builds on the rhythm of the last, and by the sixth your hands will know what to do before your brain catches up.
1. Running stitch: the workhorse
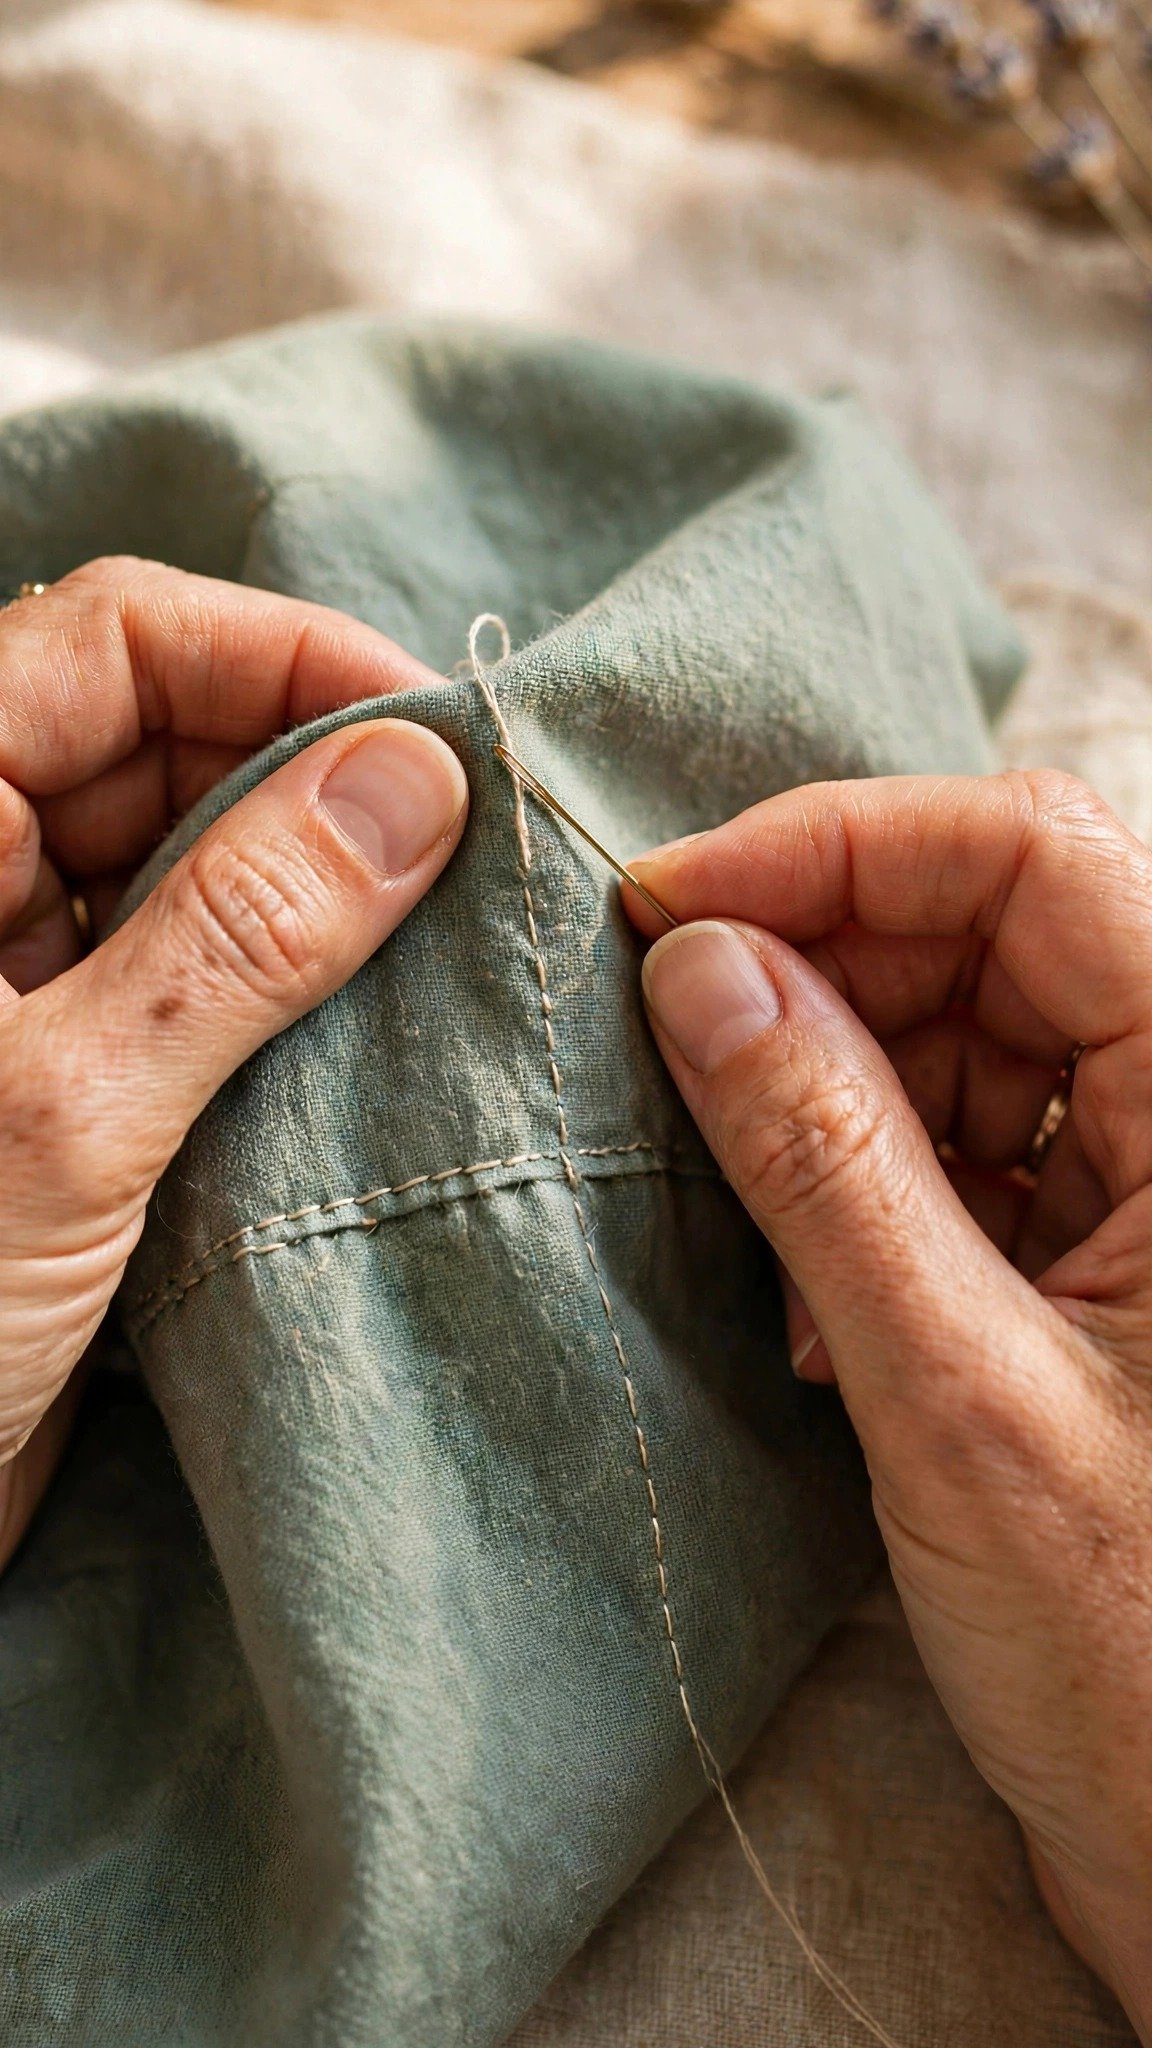
The running stitch is the first hand stitch everyone learns and the one you will use the most. The needle weaves in and out of the fabric in even bites, making a dashed line on both sides. It is fast, it is simple, and it does a shocking amount of work.
Use it for basting layers together before machine sewing, gathering fabric into ruffles, simple seams on lightweight fabric, and hand quilting. The stitch length is your dial: long stitches, about a quarter inch, for basting you plan to remove; short stitches, about an eighth inch, for seams that need to hold.
To sew it: knot your thread and come up through the fabric. Push the needle down a stitch length ahead, then bring it back up another stitch length ahead. Keep going, aiming for even spacing. The back of your work should look like the front, just offset. If your stitches wander, draw a light pencil line and follow it until your hands learn the rhythm.
2. Backstitch: the strong one
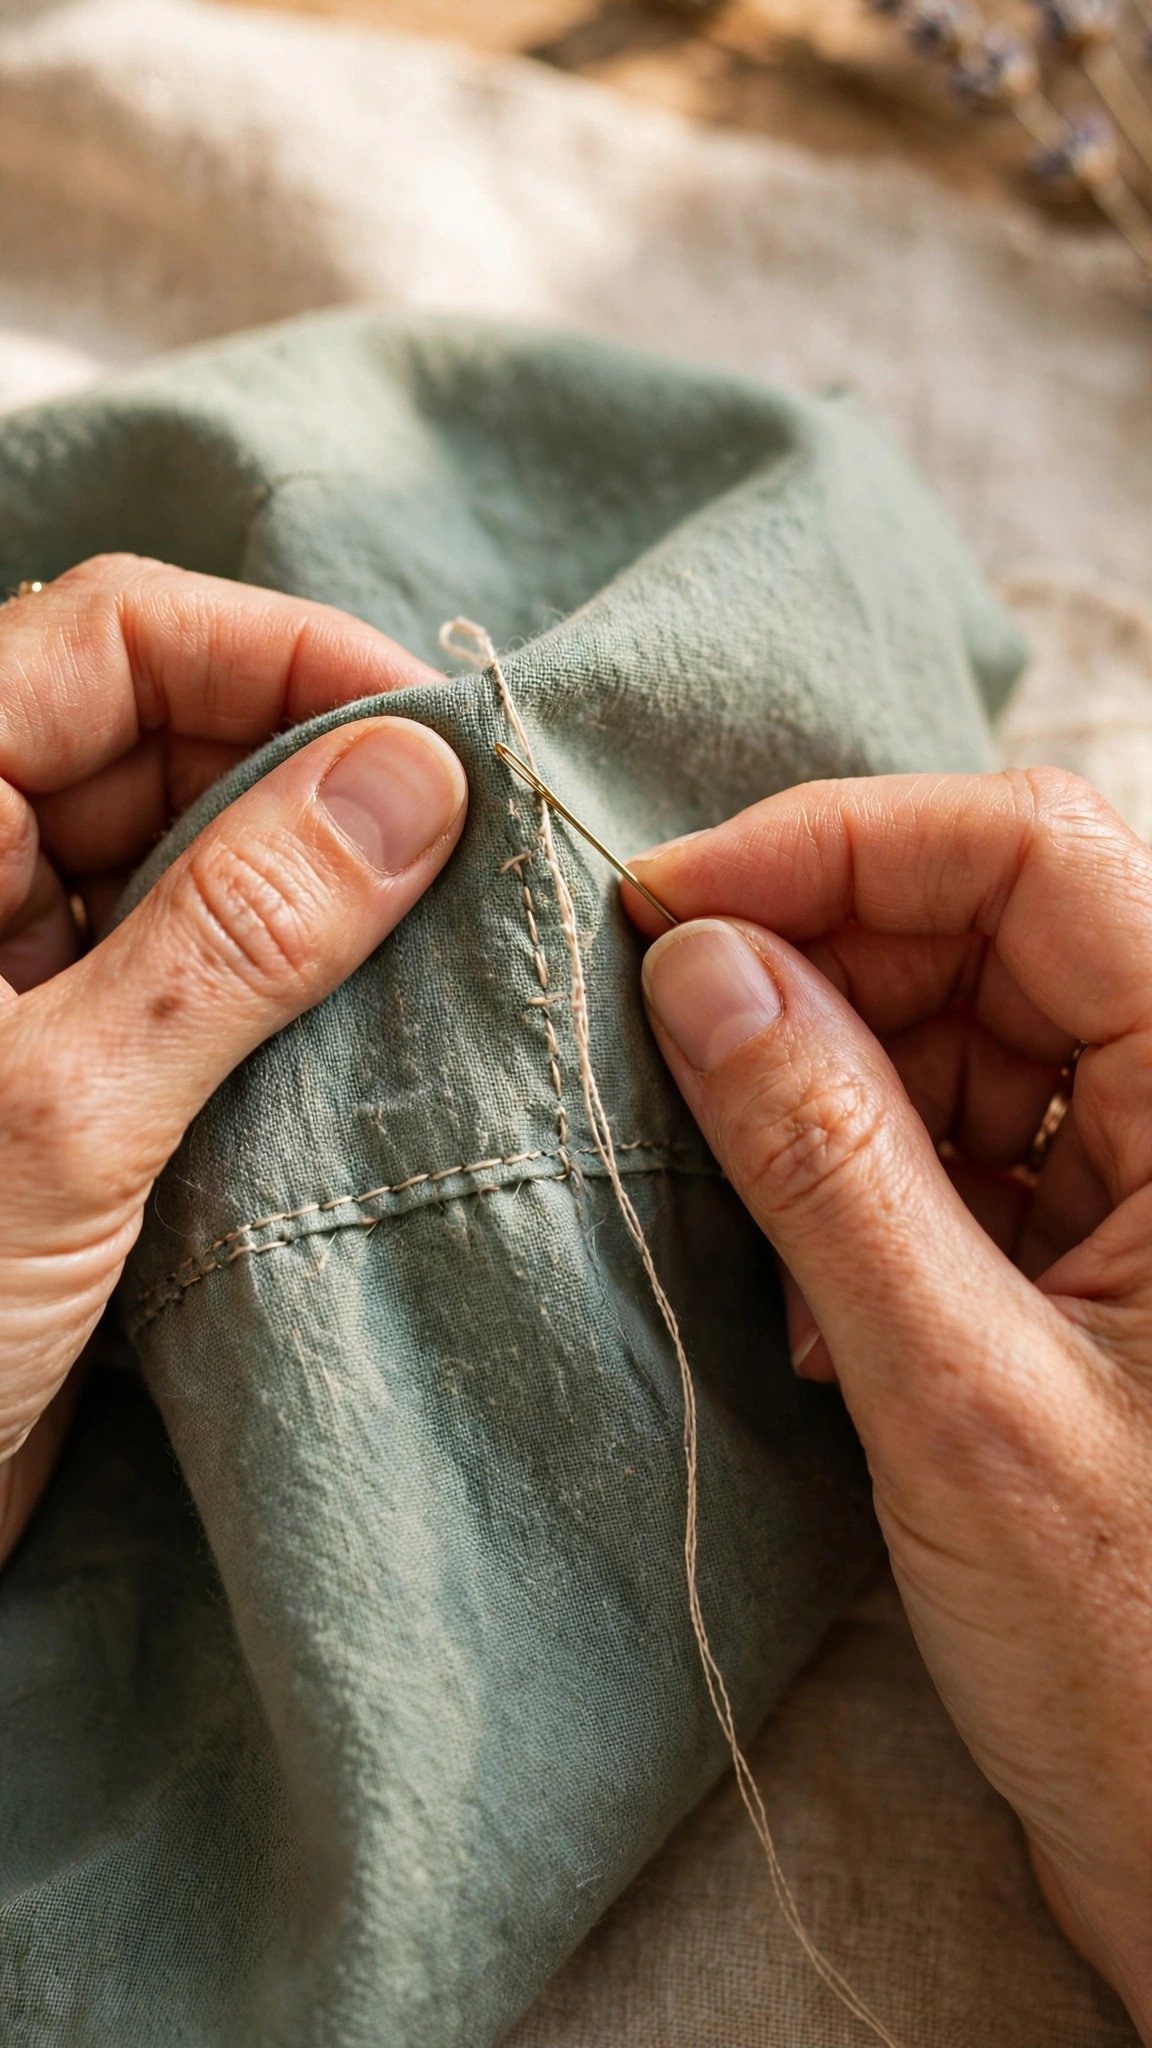
If the running stitch is a dashed line, the backstitch is a solid one. It is the strongest hand stitch there is, and on the right side it looks remarkably like machine stitching. When a seam has to hold under stress and you are sewing by hand, this is the stitch.
Use it for seams in areas the machine cannot reach, repairing split seams in garments, attaching small pieces like pockets or labels, and any hand-sewn seam that will take pulling. It is slower than the running stitch. Strength takes time.
To sew it: come up through the fabric one stitch length ahead of where you want the seam to start. Go back down at the starting point, then come up again one stitch length ahead of where you emerged. Each new stitch overlaps the last by going back into the end of the previous stitch. Keep your stitch length short and even, about an eighth of an inch, and your seam will be as strong as hand sewing gets.
3. Whipstitch: the edge joiner
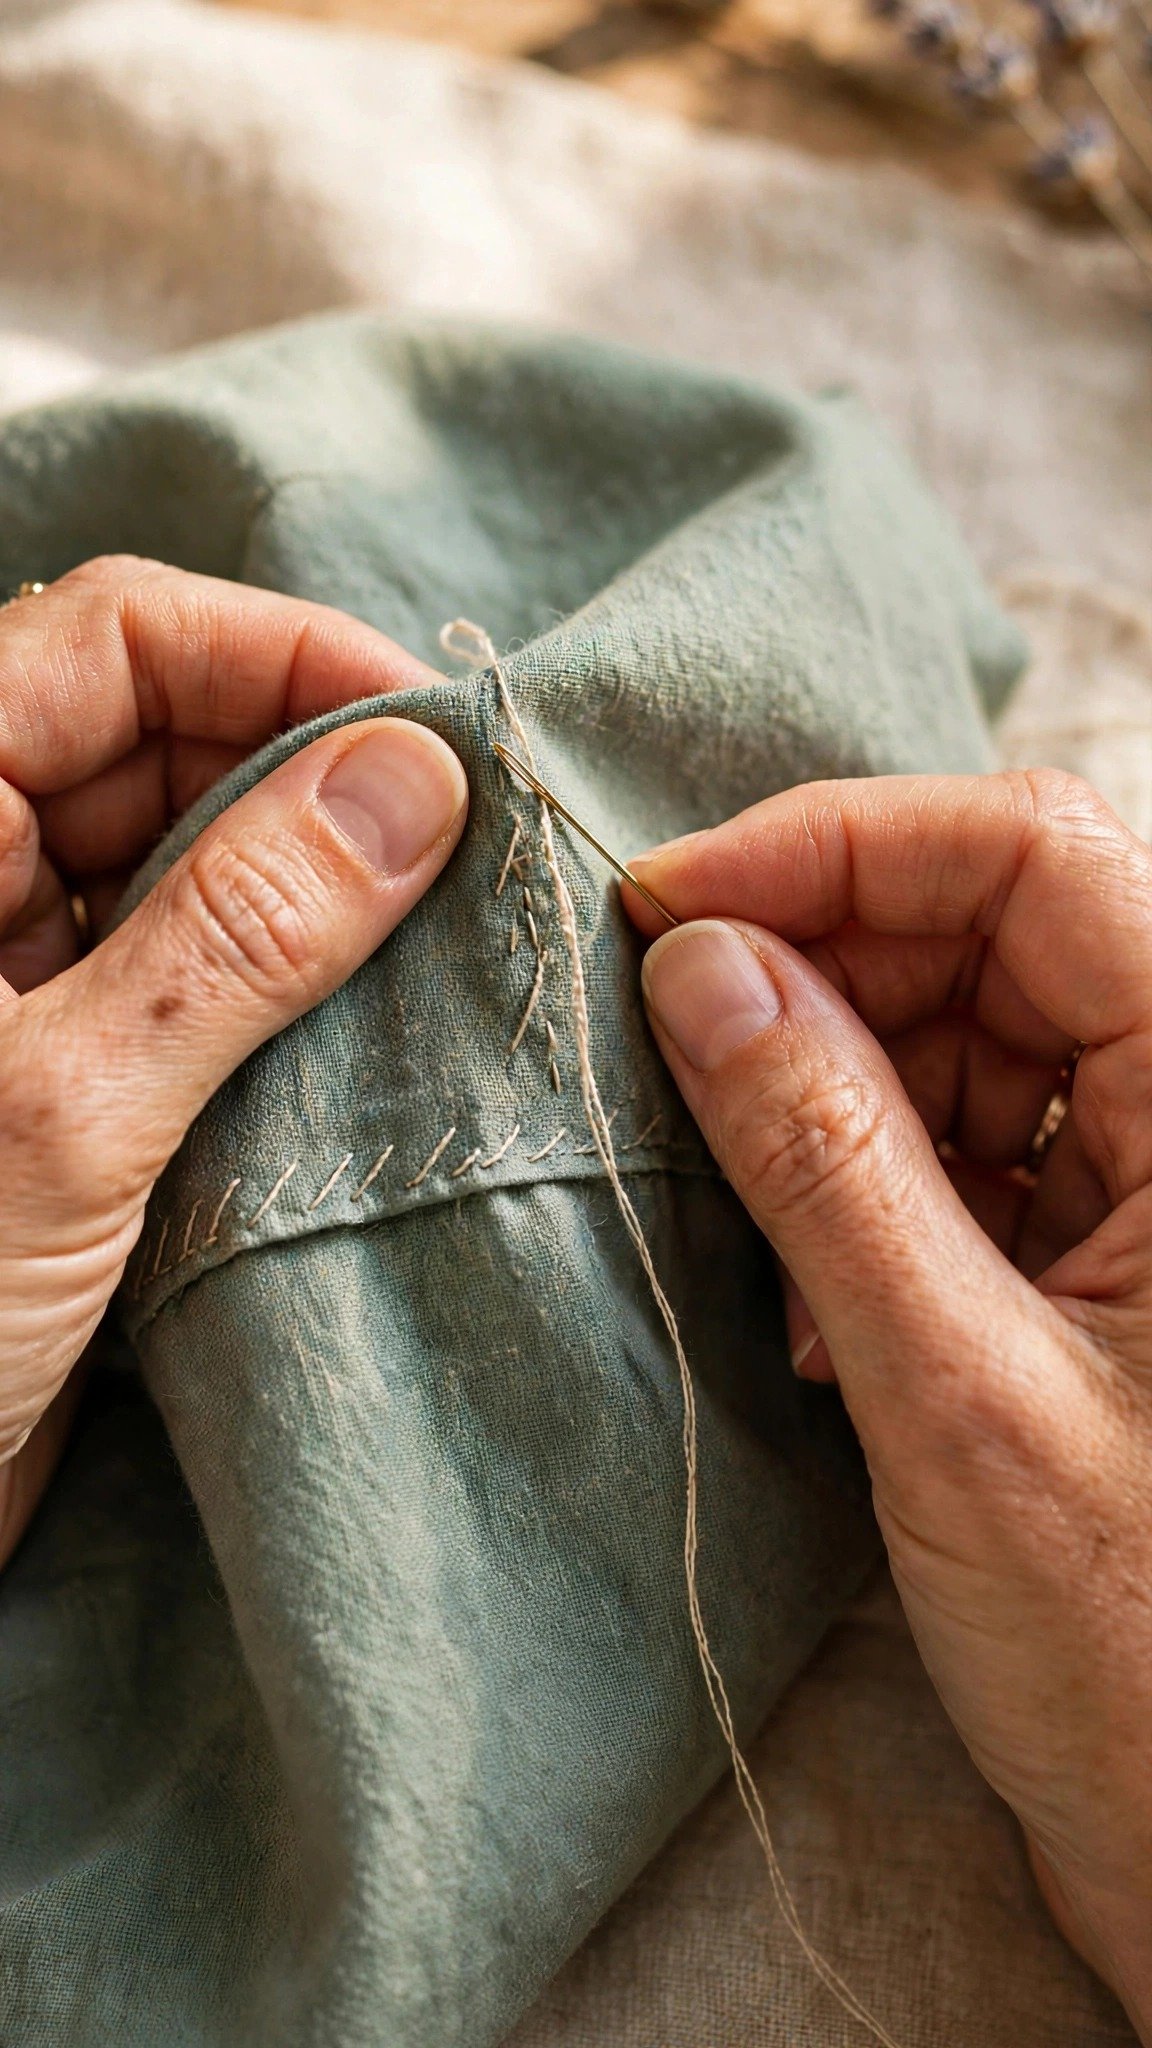
The whipstitch makes slanted stitches that wrap over an edge, pulling two pieces together. It is not subtle and it is not meant to be. It is the stitch of applique, patches, and quick sturdy joins.
Use it for appliqueing shapes onto a background, sewing patches onto jackets and bags, closing the edges of felt projects, and overcasting raw edges to stop fraying in a hurry. It shows on the surface, so match your thread or make the thread a design choice.
To sew it: hold or pin the two pieces together. Come up through the back layer near the edge, then angle the needle over the edge and down through both layers a short distance along. Each stitch slants in the same direction, like a row of tiny forward slashes. Keep the spacing even and do not pull so tight that the edge puckers.
4. Slip stitch: the invisible one
The slip stitch, sometimes called the ladder stitch, is the reason store-bought-looking hems exist. It hides the thread inside a fold so the stitching is nearly invisible from the right side. Linings, hems, and pillow covers closed after turning all depend on it.
Use it for hemming trousers, skirts, and dresses where you do not want visible stitching, closing the turning gap on pillows and stuffed toys, attaching linings to garments, and tacking facings down. If you only master one invisible stitch, make it this one.
To sew it: fold the hem up and press it. Come up through the folded edge with your knotted thread. Directly across, take a tiny bite of the garment fabric, just a thread or two, then slide the needle along inside the fold for about a quarter inch and come out again. Repeat. From the right side you should see almost nothing, just the occasional pinprick where the needle caught the fabric.

5. Blanket stitch: the edge finisher
The blanket stitch makes a row of looped stitches along an edge, each one locking the last. It finishes raw edges on thick fabrics that would be a pain to hem, and it looks good enough to be decorative on purpose.
Use it for finishing the edges of felt and fleece blankets, applique edges that you want to feature, decorative edging on towels and table linens, and reinforcing edges that get hard wear. It is the rare stitch that is both practical and pretty.
To sew it: come up through the fabric near the edge. For the next stitch, push the needle down a short distance along and slightly in from the edge, then loop the working thread under the needle tip before pulling through. The loop catches around the thread and forms the characteristic L shape. Keep the vertical legs the same depth and the spacing even, and the row will look professionally finished.

6. Catch stitch: the flexible hem
The catch stitch makes a row of crossed stitches that hold a hem while letting it move. It is the hem stitch for fabrics with stretch or garments with lining, anywhere a rigid hem would fight the fabric.
Use it for hemming knit garments, hemming lined skirts and jackets where the lining needs to float, tacking interfacing to fabric, and any hem on fabric that shifts. The crossed structure gives where a straight stitch would pop.
To sew it: work left to right with the hem facing you. Take a tiny bite in the garment above the hem, then a tiny bite in the hem fold below and slightly to the right, alternating up and down. The thread crosses between the bites forming X shapes. Keep the bites small and do not pull tight. The hem should lie flat and move freely.

Hand sew or machine sew: how I decide
New sewists tend to treat hand and machine sewing as rivals. They are teammates with different jobs. If you are wondering when to hand sew and when to trust the machine, here is the hand sew vs machine sew framework I actually use: I reach for the hand needle when the job needs invisibility, delicacy, or access: hems that should not show, linings, delicate fabrics the feed dogs would chew, basting, small repairs, buttons, and anywhere the machine’s bulk cannot go. I reach for the machine when the job needs speed and brute strength: long straight seams, topstitching, heavy layers, and anything where twenty inches of stitching stands between me and dinner.
Basting deserves special mention because beginners skip it and then wonder why layers shift. Ten minutes of long running stitches before machine sewing a tricky seam, like matching plaids or setting a sleeve, saves thirty minutes of seam ripping. The humble basting stitch is the most underrated time-saver in sewing.
My strong opinions about cheap thread
I told you this was coming. Cheap thread is the most expensive supply in your sewing kit, because it costs you time, temper, and finished projects. Bargain-bin thread breaks mid-seam, sheds lint into your machine’s tension discs, tangles into nests for sport, and fades in the wash so your navy hem turns dusty blue by summer. I learned this the way everyone learns it: by blaming myself for six months before blaming the thread.
Good thread is smooth, consistent in thickness, and strong enough that you cannot snap it easily between your hands. For most sewing, an all-purpose polyester from a reputable maker does everything well: it has a little give, it sews on the machine and by hand, and the color stays put. Cotton thread is lovely for natural fibers and quilting but has no stretch, so it can snap in seams that take stress. Silk thread is a luxury for hand finishing and basting, not a daily driver.
My rule is simple: buy the decent thread, in the colors you actually sew with, and stop buying the giant rainbow assortment of mystery thread. A small collection of good thread beats a drawer of bad thread every single time. If you want the full breakdown of what to buy and why, my guide to the best thread for sewing machines covers machine thread in detail, and most of it applies to hand sewing too.
Three practice drills that build real skill
Reading about stitches builds zero skill. Ten minutes with a needle builds real skill. Here are the three drills I give every beginner, and they pair well with the easy sewing projects for beginners I recommend once your hands know the basics.
Drill one: the straight line. Draw parallel lines on a scrap of muslin with a ruler and pencil. Sew running stitch along each line, aiming for even stitches that sit on the line. Then do it again with backstitch. Boring? Yes. Effective? Completely.
Drill two: the hem sandwich. Fold and press a hem on a fabric scrap, then slip stitch it down. Turn it over and check the right side. If you can see your stitches, your bites are too big. Do it again smaller. Repeat until the right side looks untouched.
Drill three: the repair challenge. Find a garment with a loose button or a small split seam and fix it with backstitch or whipstitch. Real repairs teach faster than practice scraps because the stakes are real and the satisfaction is immediate.

Frequently asked questions
How long should my hand-sewing thread be? About eighteen inches, roughly fingertip to elbow. Longer thread tangles and wears thin from repeated passes through the fabric. When in doubt, cut it shorter. Rethreading takes ten seconds. Untangling takes ten minutes.
Why does my thread keep tangling? Three usual suspects: the thread is too long, you are letting it twist as you sew, or the thread is cheap and fuzzy. Shorten it, let the needle dangle and untwist every few stitches, and upgrade your thread. In that order.
Do I really need a thimble? Not on day one, but yes eventually. Pushing a needle through denim or multiple layers without one teaches you why thimbles exist, painfully. Get an adjustable metal one and give yourself a week to get used to it.
Can hand stitching replace machine seams? For small jobs, genuinely yes. A backstitched seam is strong enough for repairs, doll clothes, and small accessories. For a whole garment, your hands will mutiny. Use the machine for the long seams and hand stitching for the finishing.
Which stitch should I use to hem pants? The slip stitch, nearly always. It hides inside the fold so the hem is invisible from the outside. Use the catch stitch instead if the pants are knit or lined and the hem needs to move.
Six stitches, one needle, and decent thread
That is the whole hand-sewing curriculum that matters. Running stitch for speed, backstitch for strength, whipstitch for edges, slip stitch for invisibility, blanket stitch for finishing, and catch stitch for hems that move. Everything else in the hand-sewing universe is a variation on these six. Thread a needle tonight, run through the three drills, and notice how quickly your hands stop asking your brain for instructions. That feeling is the real beginning of sewing.

Written by June Carter
I am June, a sewing enthusiast who loves turning simple fabric into things people actually use. I test every technique and product I write about at my own machine before it lands here.