

Pick up your favorite pair of jeans and look at the long seam running down the leg. See those two neat, parallel rows of stitching with no raw edges anywhere? That is a flat-felled seam, and learning how to sew a flat-felled seam is one of the most useful skills a garment sewer can have. It is the strongest seam in common use, it looks clean on both sides, and it never frays, which is why jeans, work shirts, and menswear live on it.
Here is my honest opinion: once you sew your first flat-felled seam, you will start using it everywhere it makes sense, on tote bag handles, on kids’ clothes that get dragged through the playground, on any seam you never want to think about again. The process is just four moves: stitch, trim, fold, stitch again. Let me show you exactly how I do it.
What a Flat-Felled Seam Is
A flat-felled seam encloses all the raw edges inside a folded band of fabric, held down by two rows of stitching. The first row joins the two pieces. Then you trim one seam allowance, fold the wider allowance over the trimmed one, and sew a second row of stitching close to the fold. The result lies flat, resists fraying completely, and distributes stress across both stitch lines, which is what makes it so much stronger than a plain seam.
Compared to a French seam, which is also fully enclosed, the flat-felled seam is flatter and tougher, while the French seam is lighter and better for sheer fabrics. I reach for the flat-felled seam on denim, twill, canvas, and any medium to heavy woven that takes a beating. On very lightweight or sheer fabric, it creates too much bulk, and a French seam is the better call.
What You Will Need
You need less than you think: your two fabric pieces, thread, pins or clips, sharp scissors, an iron, and your sewing machine with a standard foot. Use a thread that matches, or go bold with a contrasting topstitch thread for that classic jeans look. Gold thread on indigo denim is iconic for a reason.
One choice matters a lot here: stitch length. For the structural first seam, use your normal stitch length, around 2.5 mm. For the visible second row, I lengthen slightly to 3 or 3.5 mm, because longer stitches look better as topstitching and are less likely to pucker on heavy fabric. If you are sewing denim, a jeans needle makes the whole job smoother. My guide on how to choose a sewing machine needle explains when to switch from universal to specialty needles.
How to Sew a Flat-Felled Seam, Step by Step
The classic method starts with the fabric wrong sides together, which feels backwards the first time. Trust the process.
1. Stitch wrong sides together. Place your two fabric pieces with wrong sides facing each other, aligning the raw edges, and pin along the seam line. Sew at your project’s seam allowance, 5/8 inch is standard. This first seam is the structural one, so backstitch at both ends.
2. Press the seam to one side. Press both seam allowances to one side. On jeans this is usually toward the back of the garment, but on a standalone seam, either side works. Decide which side the finished felled seam will show on, because that determines everything that follows.
3. Trim one seam allowance. Trim the lower seam allowance, the one sitting against the fabric, down to about 1/4 inch. Leave the upper allowance at its full width. This step is what keeps the finished seam from getting bulky: the trimmed layer hides completely inside the fold of the wider layer.
4. Fold the wide allowance over. Fold the untrimmed seam allowance over the trimmed one, tucking the raw edge underneath so it wraps the trimmed edge completely. Press this fold well. The folded band should be an even width along the whole seam, and the raw edge must stay tucked inside. Pin or baste it in place if it wants to unfold.
5. Edge stitch the fold. Topstitch close to the folded edge, about 1/8 inch away, catching all layers. This second row of stitching is the one everyone sees, so sew slowly and keep it straight. Backstitch at the start and finish. Press the finished seam flat from both sides.
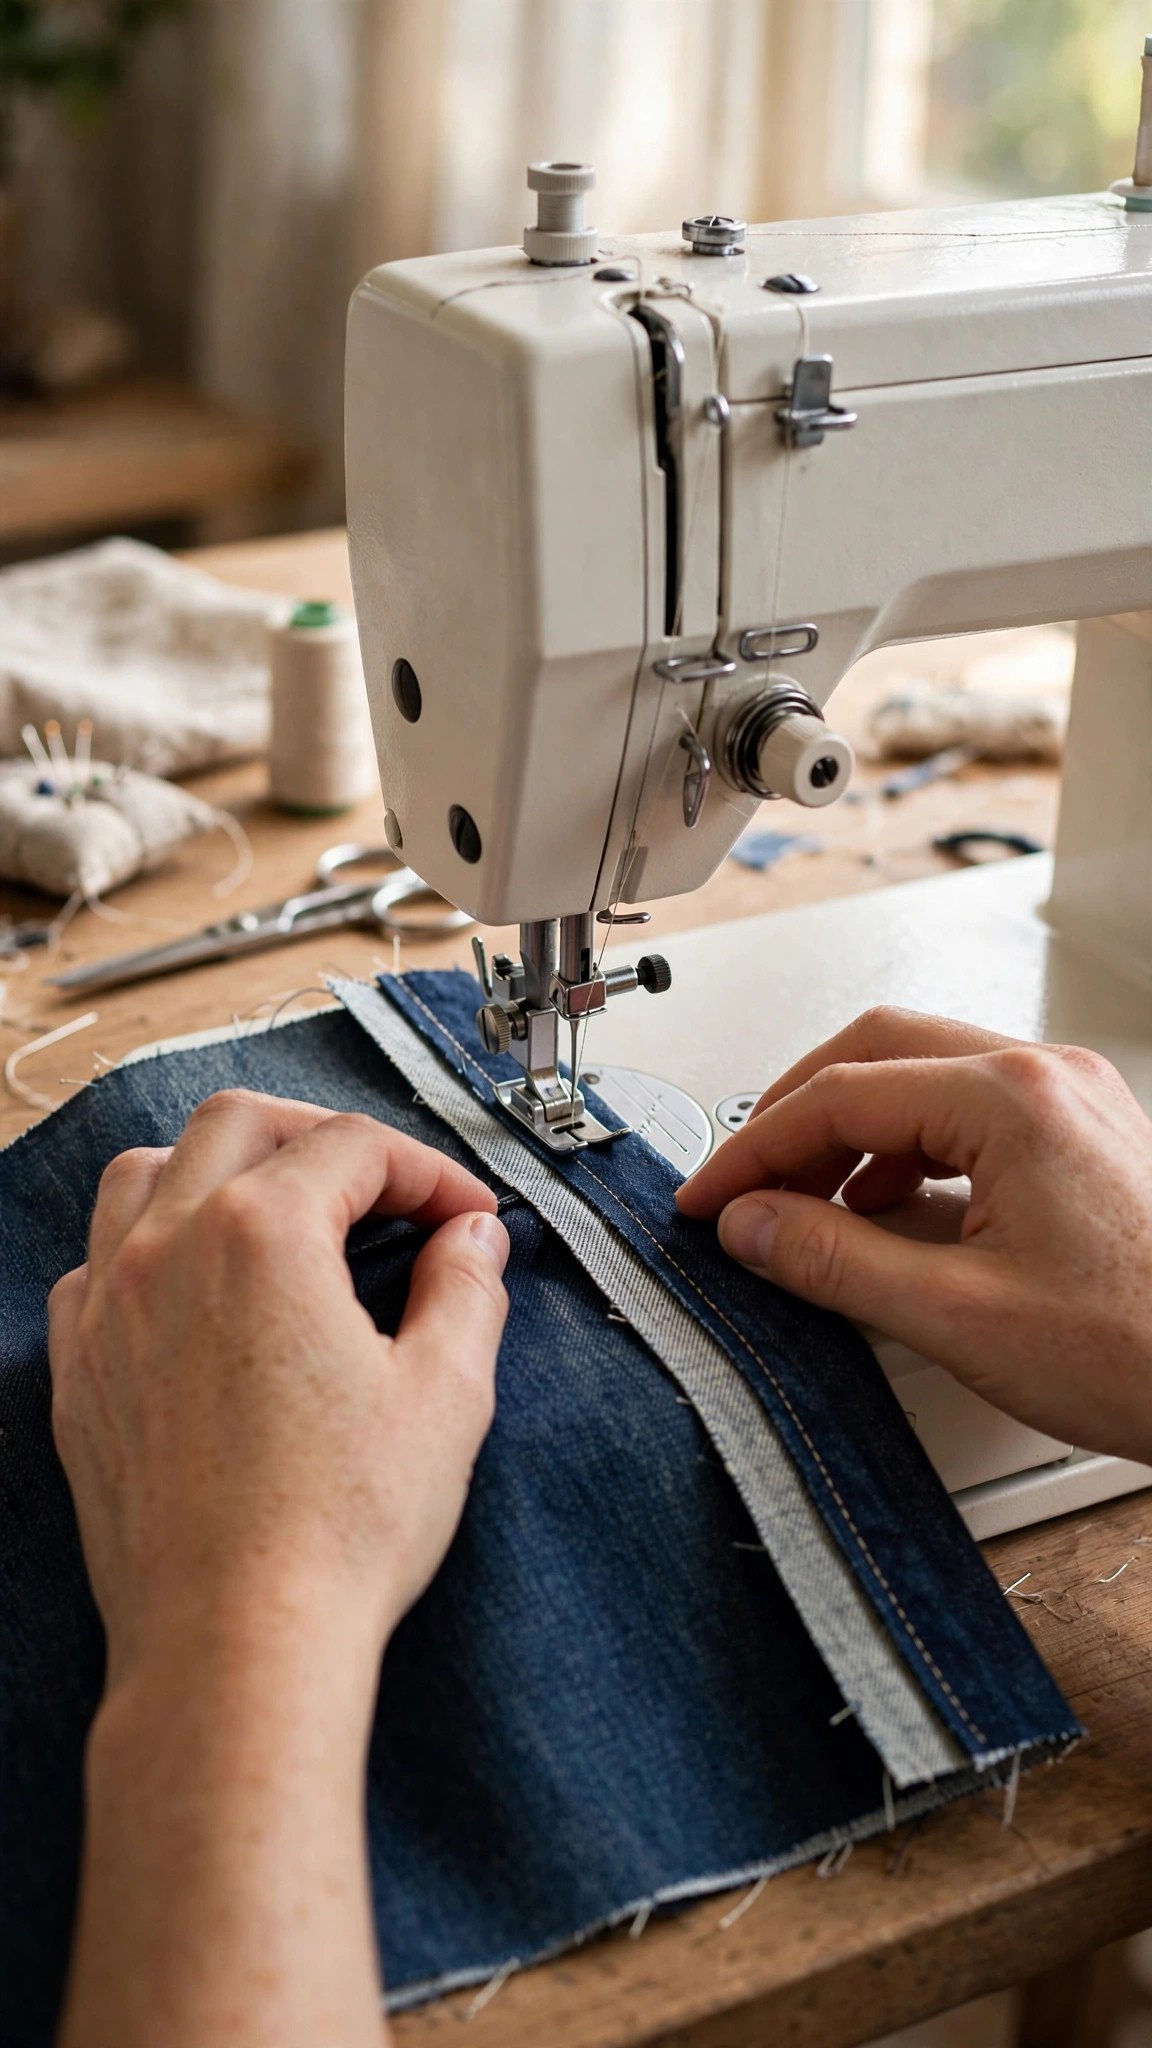
Right Side or Wrong Side: Which Way to Fell
Here is the question every beginner asks: do you sew a flat-felled seam on the right side or the wrong side of the fabric? The honest answer is that it depends on the look you want. On nearly all denim clothing, the seam allowances are felled on the outside, the right side, of the garment. Those visible double stitch lines are part of the classic jeans look.
For the traditional method I described above, you start wrong sides together, and the finished felled band ends up on one side of the work. If you want the band visible on the garment’s right side, like jeans, arrange it so the band falls on the right side. If you want a cleaner look with the band hidden inside, like on a dress shirt yoke, fell it toward the wrong side. There is no single correct answer, just the look your project calls for. On a first practice piece, try it both ways and see which finish you prefer.
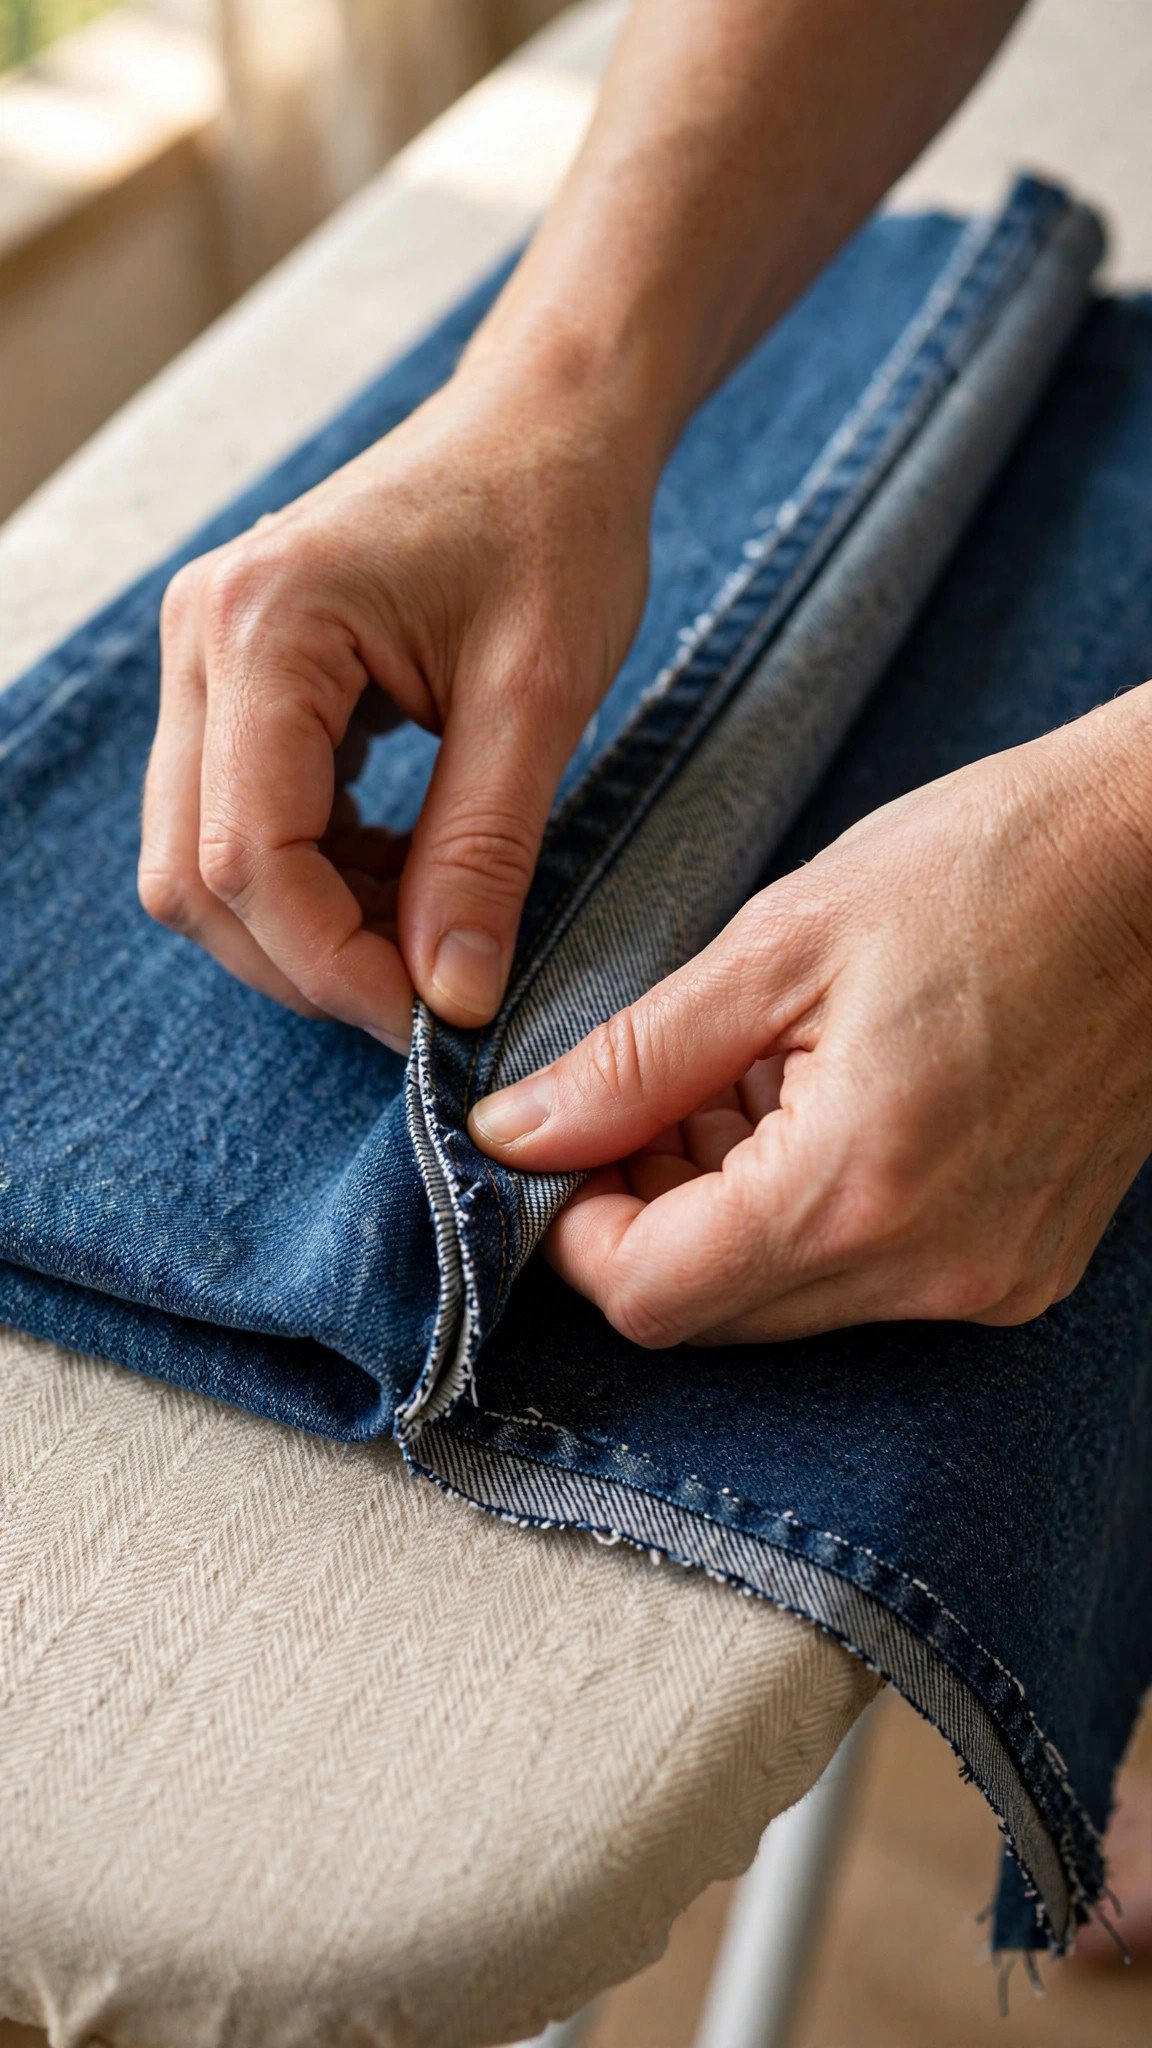
The Mock Flat-Felled Seam (Faster, Less Bulk)
Sometimes you want the look without the layers. The mock flat-felled seam, also called the faux flat-felled seam, gives you the two visible stitch lines with far less bulk and ironing. Here is how: sew the seam right sides together as normal, press both allowances to one side, finish the raw edges together with a zigzag or serger, then topstitch from the right side through all layers, one row near the seam line and one row near the edge of the allowances.
The raw edges are not enclosed, just finished, so it is not as strong or as clean inside as the real thing. But on heavy fabrics where a true flat-felled seam would be a bulky monster, or when you are in a hurry, the mock version is a perfectly respectable choice. I use it on thick canvas bags and on seams that will be hidden inside a lining anyway.
Troubleshooting: Puckering, Bulk, and Wandering Stitch Lines
Puckering along the second row of stitching is the most common complaint. It usually comes from a stitch length that is too short for the fabric weight, or from stretching the fabric while sewing. Lengthen your stitch to 3 mm or more, press the fold firmly before stitching, and let the feed dogs move the fabric without pulling. A lighter-weight thread also puckers less than a heavy topstitch thread on medium fabrics.
If the finished seam feels stiff as a board, you trimmed too little. Trim the lower allowance closer, down to a scant 1/4 inch, and grade the upper allowance so the layers step down instead of stacking. On very heavy denim, you can also trim the upper allowance slightly before folding, just keep enough width to wrap the lower edge fully.
If your second stitch line wanders off the fold and misses the tucked edge, slow down and consider basting the fold first. A line of hand basting takes two minutes and guarantees the fold cannot shift under the presser foot. An edge-stitching foot, with its guide riding along the fold, also makes this row nearly automatic. And if your machine skips stitches on the thick layers, check my guide on how to fix skipped stitches before you blame the technique.

When to Use a Flat-Felled Seam
Reach for this seam when strength matters: jeans and trousers, workwear, shirts that get washed weekly, children’s play clothes, tote bags, and any unlined garment where the inside of the seam will be seen. It is also my pick for reversible projects, because both sides of the seam look intentional.
Skip it on sheers, very lightweight fabrics, and tight curves like armholes, where the folded band will not lie flat. For curves, you would need to clip the allowances every centimeter or so, and even then the result is lumpy. A French seam or a bound seam serves those situations better. If you are choosing a first project to practice on, a simple tote bag or a pair of pajama pants in quilting cotton is ideal. My roundup of how to choose a first sewing project has more beginner-friendly ideas that build exactly these skills.
FAQ
Do you sew a flat-felled seam with right sides or wrong sides together?
The traditional method starts with wrong sides together. You sew the first seam, trim one allowance, fold the wider allowance over, and topstitch. Whether the finished band shows on the right side or wrong side of the garment is your choice: jeans show it on the outside, shirts often hide it inside.
What is the difference between a flat-felled seam and a French seam?
Both enclose raw edges, but a flat-felled seam lies flat with two visible stitch lines and is much stronger, while a French seam is narrower, lighter, and better for sheer or delicate fabrics. Use flat-felled for durability, French for delicacy.
Can I sew a flat-felled seam on knit fabric?
It is not ideal, because the seam has no stretch and will pop when the knit stretches. If you must, use a zigzag or stretch stitch for both rows and accept that it will be less strong than on a woven. For knits, a serged seam with a coverstitch is usually the better finish.
Why is my flat-felled seam puckering?
Puckering usually means the stitch length is too short for the fabric, the fabric was stretched while sewing, or the thread is too heavy. Lengthen the stitch to 3 mm or more, press the fold well before topstitching, and do not pull the fabric through the machine.

Written by June Carter
I am June, a sewing enthusiast who loves turning simple fabric into things people actually use. I test every technique and product I write about at my own machine before it lands here.