

A button placket is the strip of fabric down the front of a shirt that holds the buttons and buttonholes, and it is the detail that separates a real shirt from a tunic with buttons glued on as an afterthought. My first button-up shirt had a placket that rippled like a flag in a storm, and I wore it exactly once, to take the trash out, in the dark. Plackets look intimidating. They are not. They are just a fold, a press, and two straight lines of stitching, and once you sew one you will wonder what all the fuss was about.
This tutorial covers the classic shirt-style button placket, the kind on a button-down shirt or shirt dress, where one side carries the buttons and the other carries the buttonholes. The method works on any woven fabric and any pattern that calls for a front placket. Give yourself an unhurried hour the first time. By the third shirt, you will do it in twenty minutes while half-watching television.
What a button placket actually is
Strip away the mystery and a button placket is a reinforced folded strip along the garment’s front opening. The button side is a simple folded placket that the buttons sew onto. The buttonhole side is a slightly wider folded placket that holds the buttonholes. They overlap down the center front, the button side on top for women’s garments, and the whole thing stays crisp because of interfacing fused to the wrong side before you fold.
Most patterns include the placket in the front pattern piece as an extension, with fold lines and cutting lines marked. If yours does, follow the pattern’s lines exactly. The measurements below are the standard shirt placket dimensions I use when drafting my own: a finished placket about one and a quarter inches wide, which is the classic proportion that looks right on everything from a crisp poplin shirt to a relaxed linen tunic.
What you need
Woven fabric cut per your pattern, with the placket extensions included. Lightweight fusible interfacing, cut into strips for both placket sides. A ruler and a fabric marker for checking fold lines. An iron, because a placket is ninety percent pressing. Your sewing machine with an all-purpose polyester thread that matches, and a fresh 80/12 universal needle. Buttons, sized to your buttonholes, which you will choose after the placket is sewn so you can match them to the finished look.
How to sew a button placket, step by step
Work on a flat surface with good light. Plackets punish rushing and reward patience, which is my least favorite kind of sewing and also the kind that produces the best shirts.
Step 1: Fuse interfacing and mark the fold lines
Cut two strips of fusible interfacing the length of your placket and the width of the finished placket plus seam allowance. Fuse one strip to the wrong side of each front piece, centered on the placket area, following the interfacing manufacturer’s instructions for heat and time. The interfacing is what keeps the placket from stretching, rippling, or going limp in the wash. Skipping it is the number one cause of sad plackets.
With the interfacing fused, mark your fold lines on the wrong side with a fabric marker: the first fold line where the placket turns under, and the second fold line where it folds back to the finished width. Check both fronts against each other before you fold anything. The two placket sides need to mirror each other, and catching a marking error now takes ten seconds while catching it after stitching takes a seam ripper and your dignity.
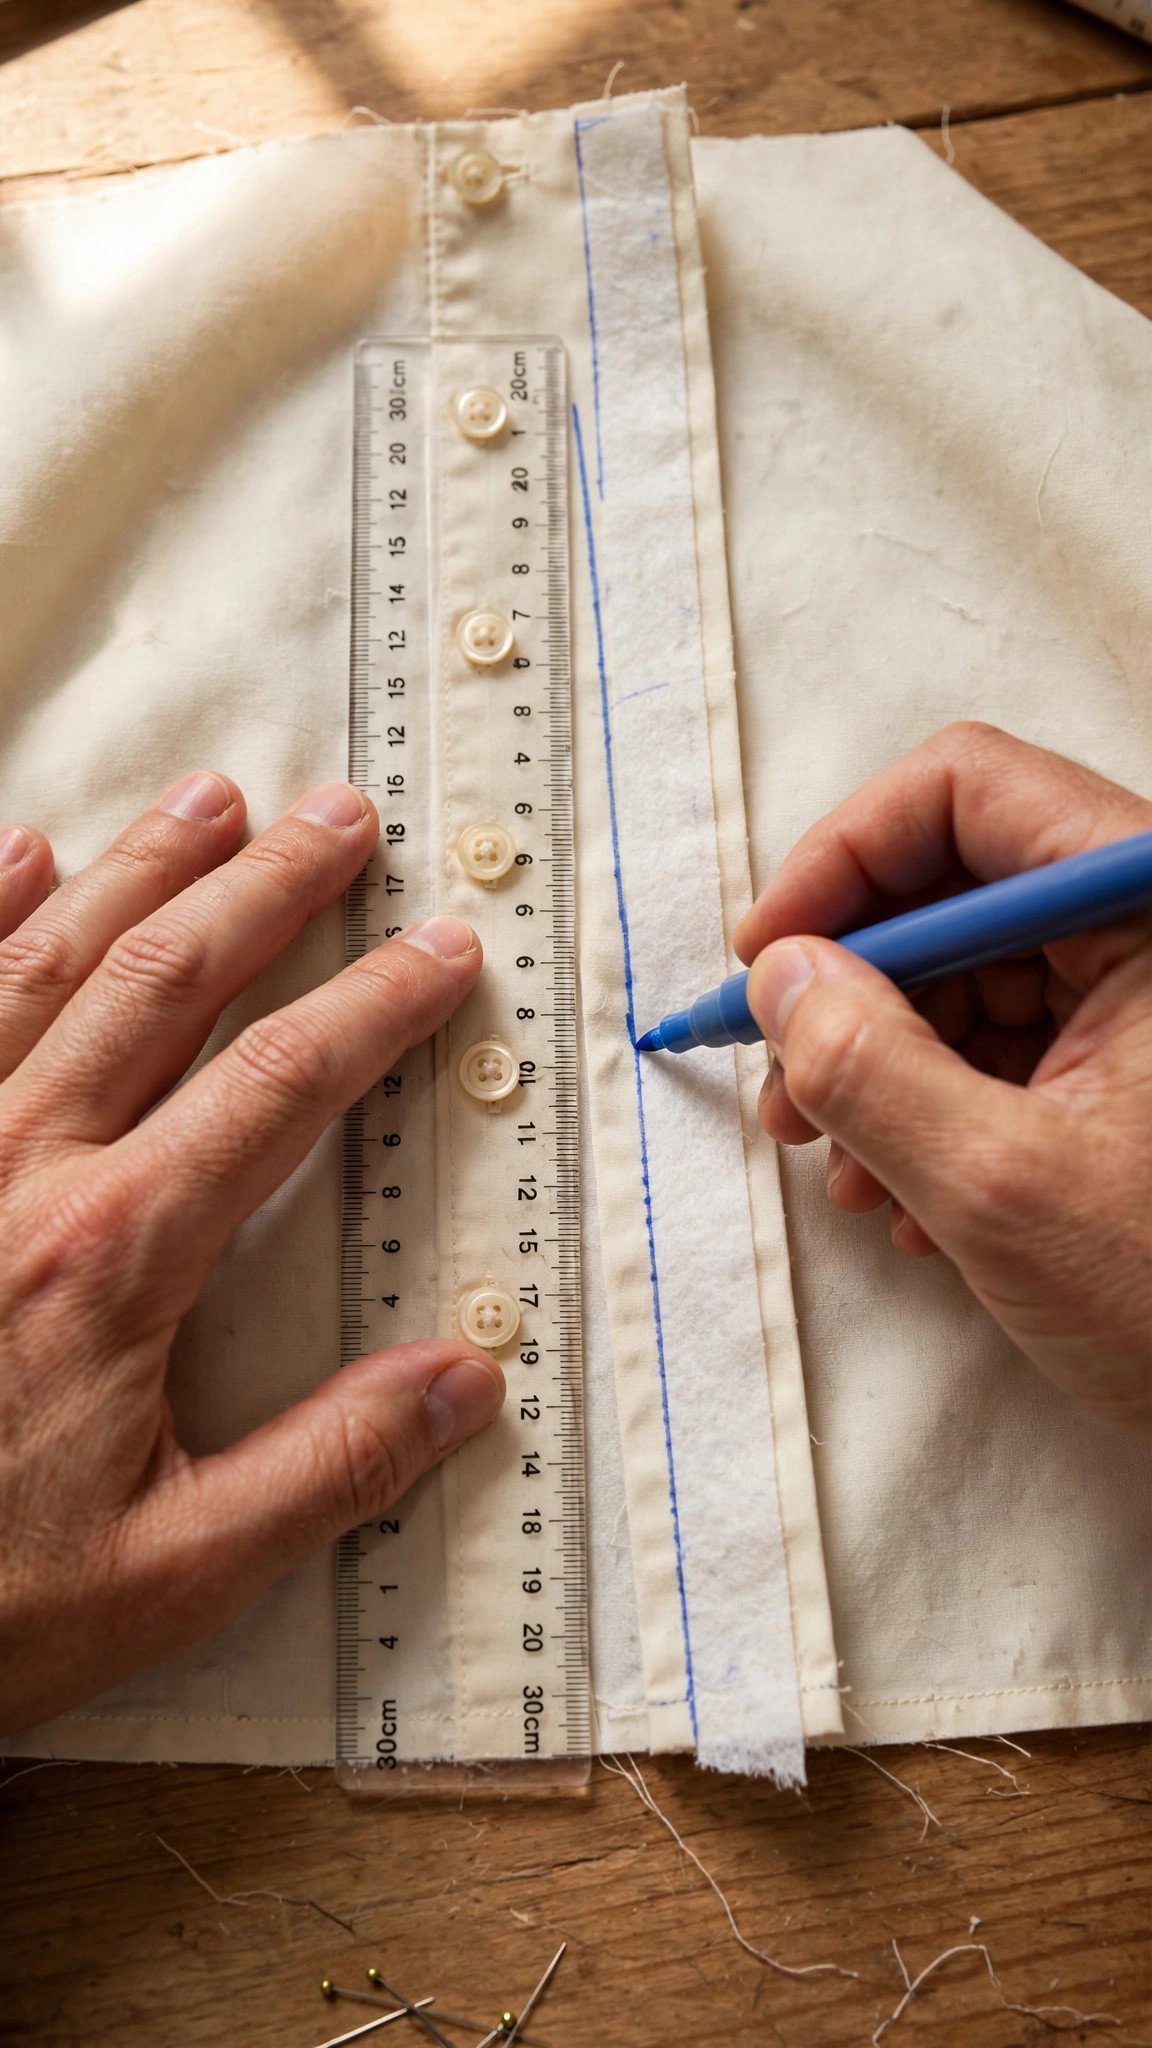
Step 2: Fold and press the placket
Fold the raw edge of the placket under along the first fold line, wrong sides together, and press it firmly. Then fold the whole placket over again along the second fold line so the raw edge is enclosed inside, and press again. What you have now is a clean folded strip with no raw edges showing, sitting on the right side of the garment front. Pin it in place every couple of inches.
This is the moment to be fussy. The placket should be the same width from top to bottom, the fold should sit exactly on your marked line, and the edge should be straight. Hold it up and sight down the length like you are checking a two-by-four for straightness at the lumber yard. Pressing is doing the real work here. The stitching just locks in what the iron decided.

Step 3: Topstitch the placket
Topstitch the placket in place, sewing close to the folded edge, about an eighth of an inch from the fold. Use a slightly longer stitch length than your construction seams, around 3.0mm, which reads as intentional topstitching rather than a construction seam showing. Sew slowly and keep the edge of the placket aligned with a guide on your machine, the edge of the presser foot or a seam guide line, so the stitching stays parallel all the way down.
For the buttonhole side, many patterns have you stitch both edges of the wider placket, which gives the buttonholes a framed, professional look and keeps the wider strip lying flat. Backstitch at the top and bottom of the placket to lock the stitching. When both fronts are done, overlap them at center front and check that the plackets line up evenly. They should sit flat against each other with no twisting or gaping.

Step 4: Mark, sew, and attach the buttons
With the placket sewn and pressed, mark your button positions down the center of the button-side placket. The standard spacing is about three to three and a half inches apart, with the top button sitting at the fullest part of the bust on a shirt. Mark the buttonhole positions on the other side to match exactly. This is worth measuring twice. Buttons that do not align with their buttonholes are the kind of detail everyone notices and nobody mentions.
Sew the buttonholes first, following your machine’s buttonhole function, then cut them open carefully with a seam ripper, placing a pin across the end as a stop so you do not slice through the bartack. Sew the buttons on by hand or machine through all placket layers, using a thread shank, a little stem of thread between the button and the fabric, so the button stands proud enough for the buttonhole layer to sit underneath without straining. My full method for this is in how to sew buttonholes, and the hand-sewing half is covered in hand-sew essential stitches.

Troubleshooting a wavy placket
A placket that ripples or waves has one of three causes, and they are all fixable. First, the interfacing: if you skipped it or used a featherweight interfacing on a substantial fabric, the placket has no backbone. Fuse a proper medium-weight interfacing and the problem usually vanishes. Second, the pressing: if the folds were not pressed crisply before stitching, the fabric eased and shifted under the needle. Press, pin, then stitch, in that order, every time.
Third, the stitching itself: a stitch length that is too short can pucker a placket, and sewing too fast lets the feed dogs push the top layer ahead of the bottom one. Lengthen to 3.0mm, slow down, and let the machine feed evenly. If the placket still waves, unpick it, press everything flat, and redo it. I have redone plackets. Everyone who sews shirts has redone plackets. The second attempt takes a third of the time and looks twice as good.
Frequently asked questions
Which side do the buttons go on for women’s shirts? The button side of the placket sits on the right front as worn for women’s garments, overlapping to the left. For men’s shirts it is reversed. When in doubt, check a ready-to-wear shirt from the closet and copy it.
Do I need interfacing in a button placket? Yes, always. The interfacing stabilizes the placket, keeps the folds crisp through washing, and gives the buttonholes something substantial to grip. A placket without interfacing will stretch, ripple, and age badly. It is the cheapest insurance in the project.
How wide should a shirt placket be? The classic finished width is about one and a quarter inches. Narrower plackets, around three quarters of an inch, suit delicate blouses. Wider plackets, up to one and three quarter inches, suit oversized and utility-style shirts. Match the width to the garment’s attitude.
Why are my buttonholes puckering? Usually a stabilizer problem: the placket needs its interfacing, and a layer of tissue or wash-away stabilizer under the buttonhole area while sewing helps on lighter fabrics. Also check that you are using the right presser foot and that the fabric is not being pushed by the feed dogs. Slow down and let the machine work.
Can I sew a placket on knit fabric? You can, but stabilize aggressively. Fuse a knit-compatible interfacing to the placket area, and consider a strip of fusible stay tape along the fold line. Knits want to stretch and curl, and an unstabilized knit placket will fight you from cutting to final press.
The fold, the press, the stitch
That is the whole button placket: interface it, fold it, press it like you mean it, and topstitch it straight. The pressing matters more than the stitching, the interfacing matters more than the pressing, and patience matters more than all of it. Sew one placket slowly and carefully, and the next ten will feel like a familiar ritual instead of a hurdle. Then stand back and look at that crisp front opening, because you just sewed the detail that makes a shirt a shirt.

Written by June Carter
I am June, a sewing enthusiast who loves turning simple fabric into things people actually use. I test every technique and product I write about at my own machine before it lands here.