
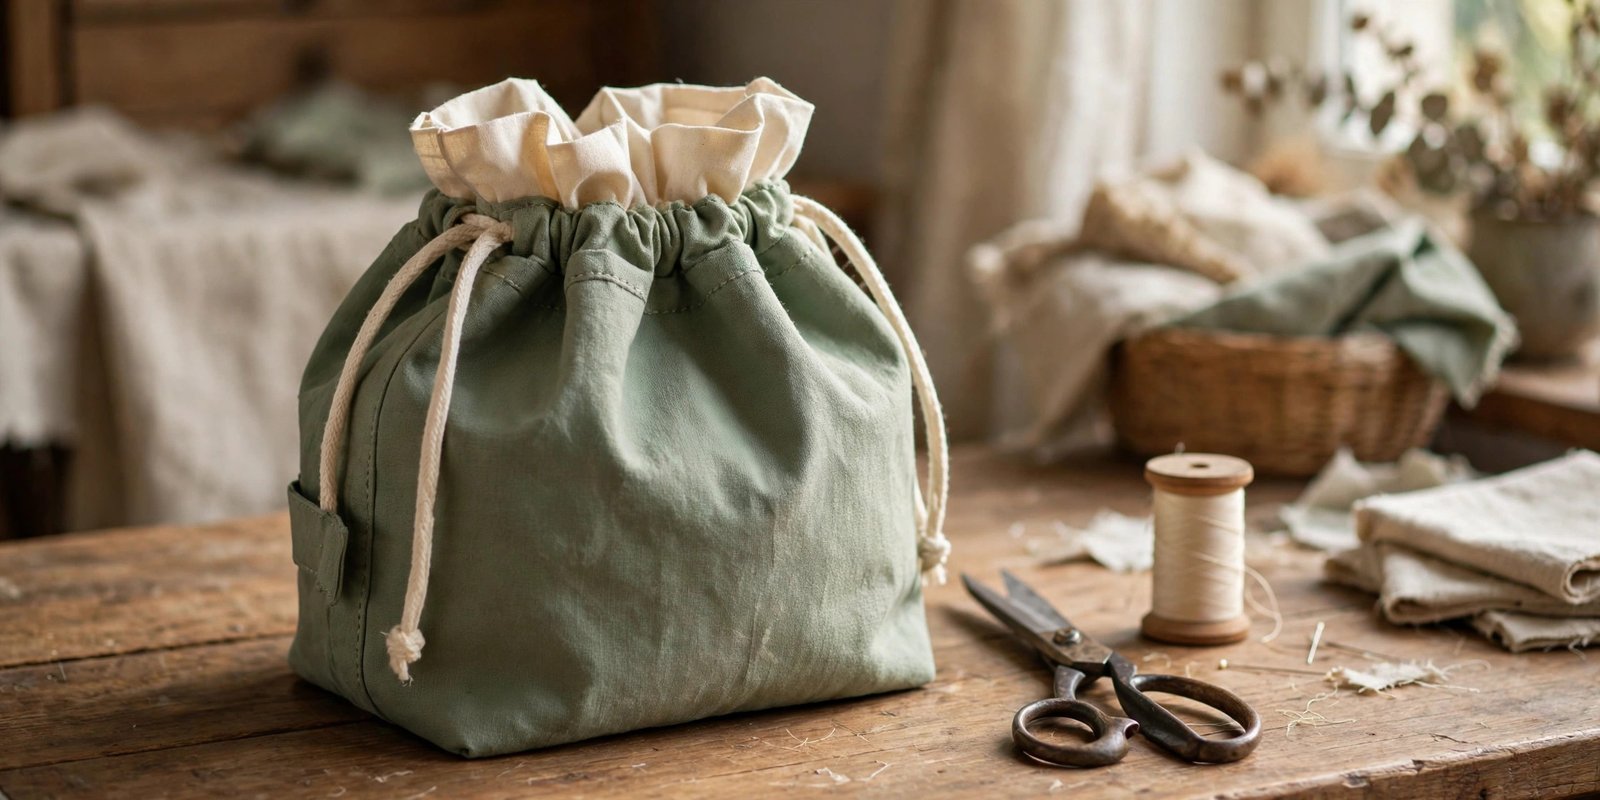
I will be honest with you. The first time I decided to learn how to sew a bucket bag, I thought the round base would be the hard part. It was not. The hard part was the week I spent staring at the idea, convinced that sewing a curve to a straight edge was some kind of advanced sorcery. Once I finally cut my pieces and sewed that first circle onto the tube, I laughed out loud at how easy it was. I had put off a wonderful project for nothing.
A bucket bag is one of the most satisfying bag projects a confident beginner can sew. Strip away the styling and it is wonderfully simple: a rectangle joined into a tube, a circle sewn to the bottom, a lining to hide the raw edges, and a drawstring or strap at the top. In a single afternoon you get a bag that looks far more complicated than it is, and along the way you pick up curved-seam skills that will serve you on every bag, pouch, and basket you sew afterward. If you can sew a straight stitch with reasonable confidence, you are ready.
What You Need Before You Start
Gather everything before you cut a single piece. There is nothing more annoying than discovering halfway through that your cord is too short or your interfacing is the wrong weight. For a medium bucket bag, roughly eight inches across the base and twelve inches tall, here is what I reach for.
For the outer shell, choose a medium to heavyweight fabric. Canvas, denim, and cotton duck are my top three because they hold the bucket shape beautifully and forgive small mistakes. A quilting cotton works too, but it will need help from interfacing to stand up. For the lining, a quilting cotton or any smooth cotton is perfect, and this is where you get to use the fun print that makes you smile every time you open the bag.
You will also need fusible fleece or foam interfacing to give the body structure, a cord or rope for the drawstring (about two yards, to be safe), matching all-purpose thread, and basic tools: a threaded sewing machine, pins or clips, a fabric marker, scissors or a rotary cutter, and an iron. If you want the polished look, add a set of grommets and webbing for the strap.
Cut list for one bag: one outer body rectangle about 26 by 13 inches, one lining body rectangle the same size, one outer base circle 9 inches in diameter, one lining base circle 9 inches in diameter, and interfacing cut to match the outer pieces. If your fabric is directional, pay attention to which way is up before you cut the body rectangle.
Choosing Fabric and Interfacing for Your Bucket Bag
This is where I get opinionated, because fabric choice decides whether your finished bag looks handmade in the best way or slumps into a sad puddle. Canvas is my undisputed favorite for bucket bags. It has enough body to hold the shape, it presses crisply, and it hides the occasional wobble in your stitching. Denim is a close second and gives the bag a casual, sturdy feel that ages nicely.
If you fall in love with a quilting cotton, and I have many times, do not skip the interfacing. Fuse a medium-weight fusible fleece to the wrong side of every outer piece and the bag will stand up on its own. Fusible fleece is more forgiving than woven interfacing here because it adds soft structure without stiffness, which suits the slouchy character of a bucket bag. Test your iron temperature on a scrap first, because scorching your fashion fabric at this stage is heartbreaking and entirely avoidable.
For the lining, use something lighter than the outer. A quilting cotton is ideal. Avoid slippery satins or anything stretchy, since the lining needs to behave while you sew it into a tube and attach the circle. And whatever you choose for the outer, prewash and press your fabric before cutting. A bag that shrinks unevenly after its first wash is no fun at all.

How to Sew a Bucket Bag: Step by Step
Here is the full assembly, from flat fabric to finished bag. Read through once before you start so nothing surprises you mid-seam.
Start by fusing your interfacing to the wrong sides of the outer body rectangle and the outer base circle, following the manufacturer’s instructions. Let the pieces cool completely before you move them, because shifting warm interfacing creates bubbles you cannot fix later.
Next, fold the outer body rectangle in half with right sides together, matching the short edges. Sew with a half inch seam allowance, backstitching at both ends. Press the seam open. You now have a tube. Repeat with the lining rectangle to make a second tube, but leave a four inch gap in the lining side seam. That gap is how you will turn everything right side out later, so mark it clearly with pins so you do not accidentally sew it closed.
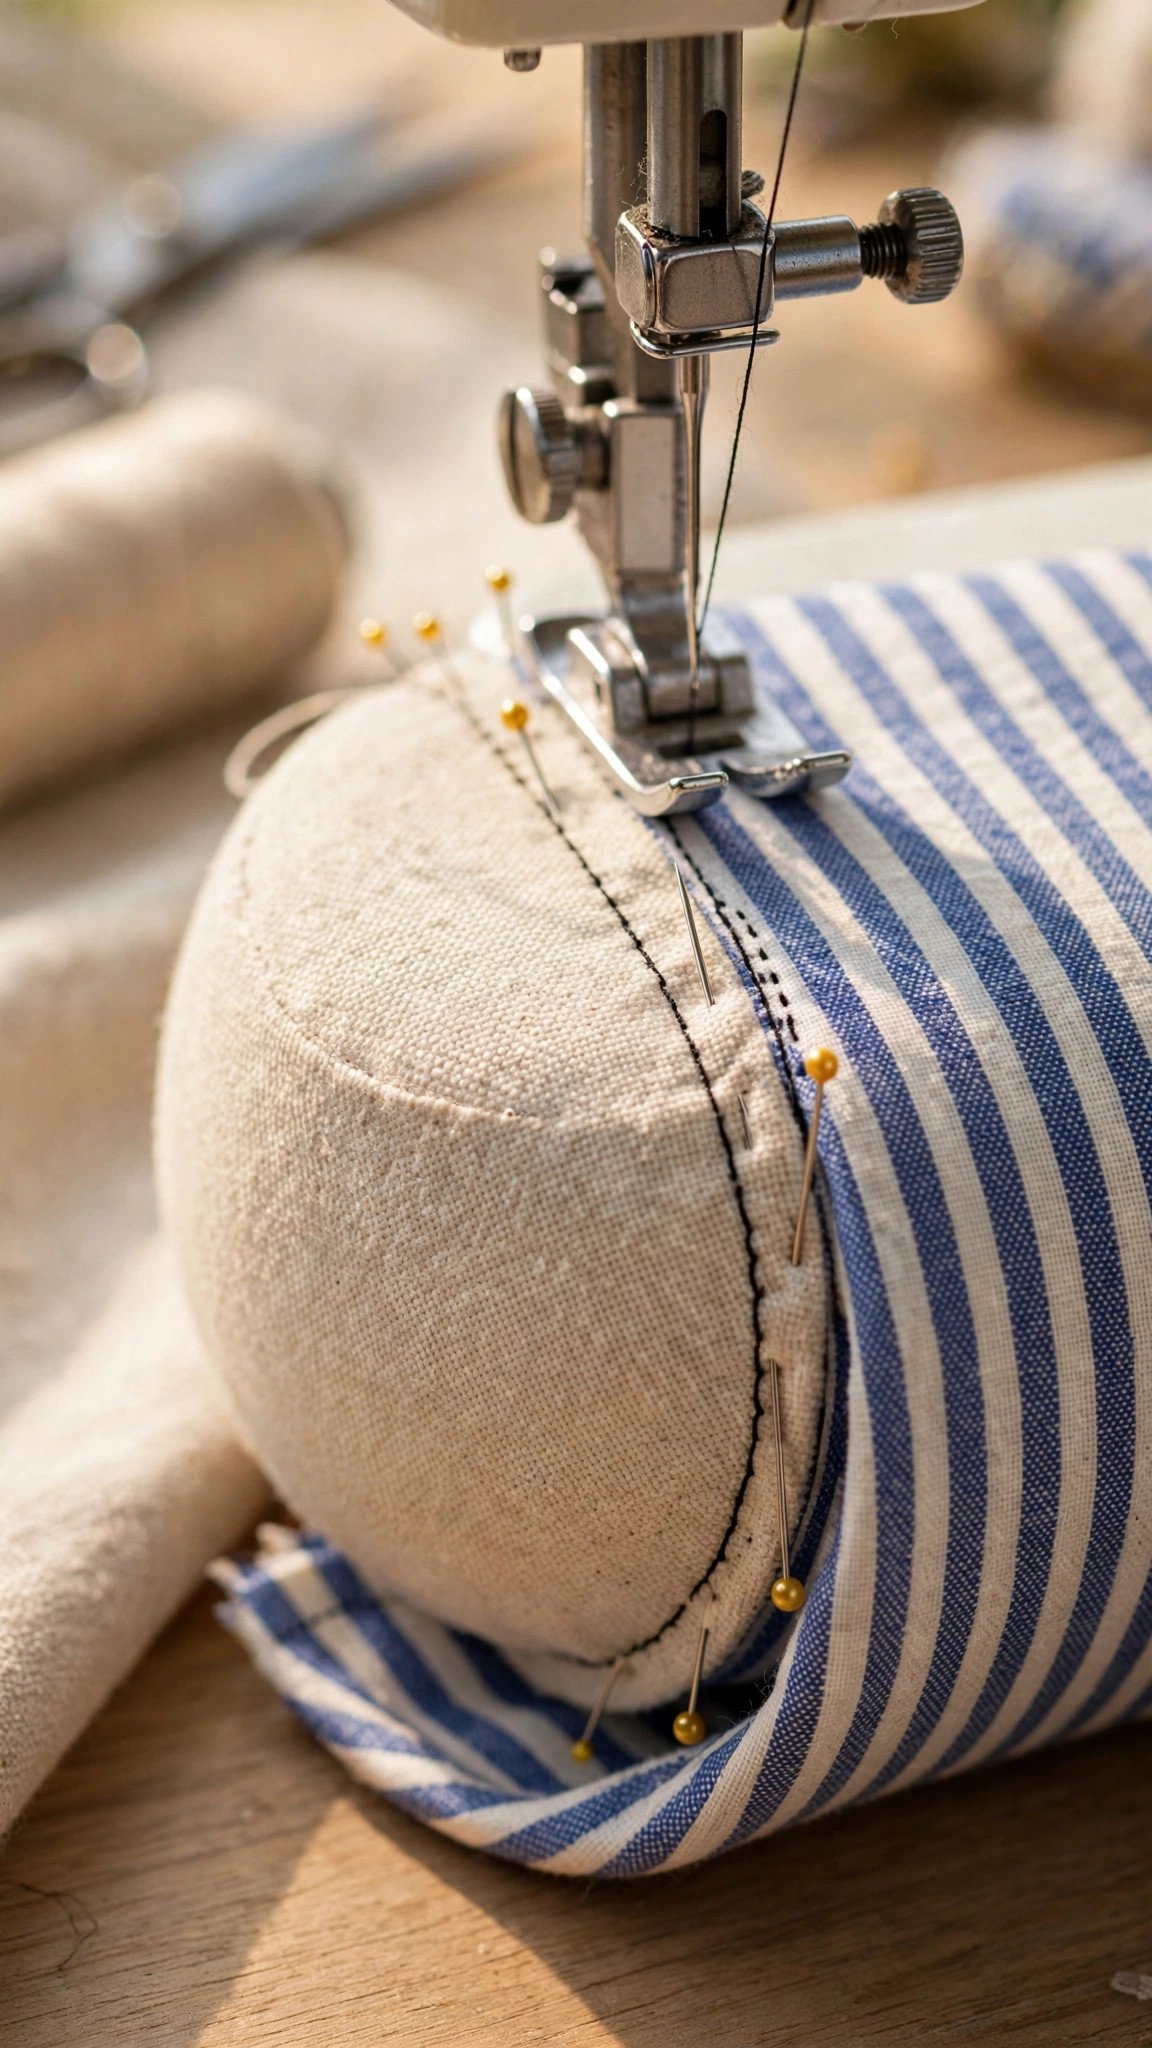
Now the part everyone worries about: the base. Stay-stitch around the edge of the outer circle just inside the seam line to keep it from stretching. Clip into the seam allowance of the tube’s bottom edge every inch or so, cutting almost but not quite to the stitching. Find the quarter points on both the circle and the tube by folding each in half twice and marking the folds. Pin the circle to the tube with right sides together, matching quarter points first, then easing the fabric between the pins. Sew slowly with the tube on top, and I will say more about this in a moment.
Attach the lining circle to the lining tube the same way. Turn the outer bag right side out and keep the lining wrong side out, then drop the lining inside the outer bag with wrong sides facing. Match the side seams, pin around the top edge, and sew all the way around.
For the drawstring, fold the top edge of the bag down by half an inch, then fold again by about an inch and a quarter to form a casing. Sew close to the inner fold, leaving a one inch opening to thread the cord. Attach a safety pin to one end of the cord and work it through the casing, then knot or finish the ends. Finally, reach into the lining gap, pull the whole bag through, and slip-stitch the opening closed. Press the top edge and topstitch around it for a crisp finish.
Attaching the Round Base Without Puckers
Let me give the base the attention it deserves, because a smooth circle seam is the difference between a bag that looks store bought and one that looks lumpy. The secret is not speed or talent. It is pinning strategy and patience.
Always sew with the tube on top and the circle underneath. The feed dogs grip the flat circle evenly while your hands gently ease the tube’s slightly longer edge to fit. Clip the tube’s seam allowance generously before you pin, because those little cuts let the straight edge relax into the curve instead of fighting it. Match your quarter points first, then pin every inch or two between them. If you pin only at the quarters, the fabric will drift and you will get tucks.
Sew slowly, stopping with the needle down to pivot and reposition every few inches. If a small pucker forms, stop, lift the presser foot, smooth the fabric flat, and continue. It is far easier to fix a pucker as it happens than to rip out a whole circle seam. When you finish, press the seam allowance toward the tube and give it a good press with steam. A well-pressed base seam looks almost invisible from the outside.
Drawstring Casings, Grommets, and Straps
The closure is where your bag gets its personality. The classic choice is a simple folded casing with a cord, and it never looks wrong. Fold, press, stitch, thread the cord with a safety pin, and you are done. Use a round braided cord or a flat cotton tape depending on the mood you want. Round cord reads casual and outdoorsy, flat tape reads neat and modern.
If you want a more polished finish, install grommets around the top edge and thread the cord through them instead of a casing. Mark the grommet positions evenly with a ruler before you cut anything, because unevenly spaced grommets are the one thing the eye catches immediately. Cut small holes, set each grommet firmly, and the drawstring will glide through beautifully.
For the strap, you have two good options. Cotton webbing is fast, strong, and comes in endless colors, so it is my default recommendation. Cut it to your desired length, finish the raw ends by folding them under, and sew the strap ends into the top seam or onto tabs sewn into the side seams. The second option is a fabric strap made like a long tube: sew, turn, press, and topstitch down both edges. A fabric strap that matches the bag looks custom and costs you nothing but a strip of leftover fabric.

Mistakes I See Beginners Make
Skipping the interfacing is the number one regret I hear about. People sew the whole bag in quilting cotton, hold it up, and watch it collapse. If your fabric is not canvas-weight or heavier, interface it. There is no way around this that ends well.
The second mistake is forgetting to backstitch. Bag seams take real stress from daily use, and a seam that is not secured at the ends will open the first time the bag is stuffed full. Backstitch at the beginning and end of every structural seam, every single time.
Third, do not rush the circle. I know it is tempting to zip around the base seam at full speed, but that is exactly how puckers happen. Slow down, keep the tube on top, and ease the fabric. The extra five minutes are worth it.
Finally, make your drawstring casing generous. A casing that barely fits the cord will jam and frustrate you every time you open the bag. When in doubt, fold the casing a quarter inch deeper than you think you need. Your future self, opening that bag one-handed while holding groceries, will thank you.
FAQ
Can a beginner really sew a bucket bag?
Yes, and I mean that sincerely. If you can sew a straight line and you are willing to go slowly around one circle, you have every skill this project requires. The curved base looks advanced but the pinning method I described above makes it very manageable.
What is the best fabric for a first bucket bag?
Canvas or denim, without hesitation. They hold their shape with minimal interfacing, they press well, and they forgive small stitching wobbles. Save the drapey quilting cottons for your second bag, once you know the construction.
Do I need grommets for the drawstring?
No. A simple folded and stitched casing works perfectly and needs no special tools. Grommets look polished and make the cord glide more smoothly, but they are an upgrade, not a requirement.
How do I keep the lining from showing at the top edge?
Cut the lining body rectangle about half an inch shorter than the outer body, or sew the top seam with the lining eased slightly inward. When you turn and topstitch, the outer fabric will roll just barely to the inside and the lining will stay hidden.

Written by June Carter
I am June, a sewing enthusiast who loves turning simple fabric into things people actually use. I test every technique and product I write about at my own machine before it lands here.