

If you have ever finished a garment only to discover it does not fit, learning how to make and fit a muslin will change your sewing life. A muslin is a rough draft of your garment, sewn from cheap fabric so you can perfect the fit before you cut into the good stuff. It feels like extra work, but it is the shortcut: one test garment now saves you from a disappointing finished piece later.
I resisted muslins for years. I told myself my measurements were accurate enough and my patterns were reliable enough. Then I sewed a dress from fabric I had been saving for months, and the bodice gaped in a way no amount of pressing could fix. That dress taught me what every experienced sewist already knows: the muslin is where the fitting happens, and the final fabric is just the reward.
What a Muslin Actually Is
So what is a muslin? It is a test garment sewn from inexpensive plain-weave cotton, also called muslin fabric, using your actual pattern pieces. You baste it together quickly, try it on, pin the adjustments, and transfer those changes back to your paper pattern. Some people call it a toile, which is the same idea with a fancier name.
A muslin is not meant to be pretty. The seams are basted, the edges are raw, and nobody will ever see it but you. Its only job is to tell the truth about fit. Make one for any fitted pattern, any expensive fabric, or any style you have never sewn before. For simple, loose garments you have made five times, you can skip it, but for everything else, the muslin earns its place.
Choose and Prepare Your Muslin Fabric
Plain cotton muslin fabric for test garment making is cheap, stable, and easy to mark, which is exactly what you want. Choose a weight similar to your final fabric: a lightweight muslin for a blouse, a medium weight for a jacket. If your final fabric has stretch, your muslin should have similar stretch, or the fitting will lie to you.
Always prewash muslin fabric before cutting, exactly as you would your fashion fabric. Muslin can shrink noticeably, and a muslin that shrinks after basting gives you false fitting information. Wash, dry, and press it the way you plan to treat the finished garment. If you need a refresher on the process, my guide to prewashing cotton and linen covers it step by step. Before you cut anything, start with taking accurate body measurements, because the muslin can only confirm the size you actually cut.
Cut and Mark the Muslin
When you cut muslin pattern pieces, cut only what you need for fitting: usually the bodice front and back, and sometimes one sleeve. Skip facings, linings, pockets, and anything else that does not affect fit. Cut your measured size, and if you are between sizes, cut the larger one, since it is easier to pin out excess than to add fabric that is not there.
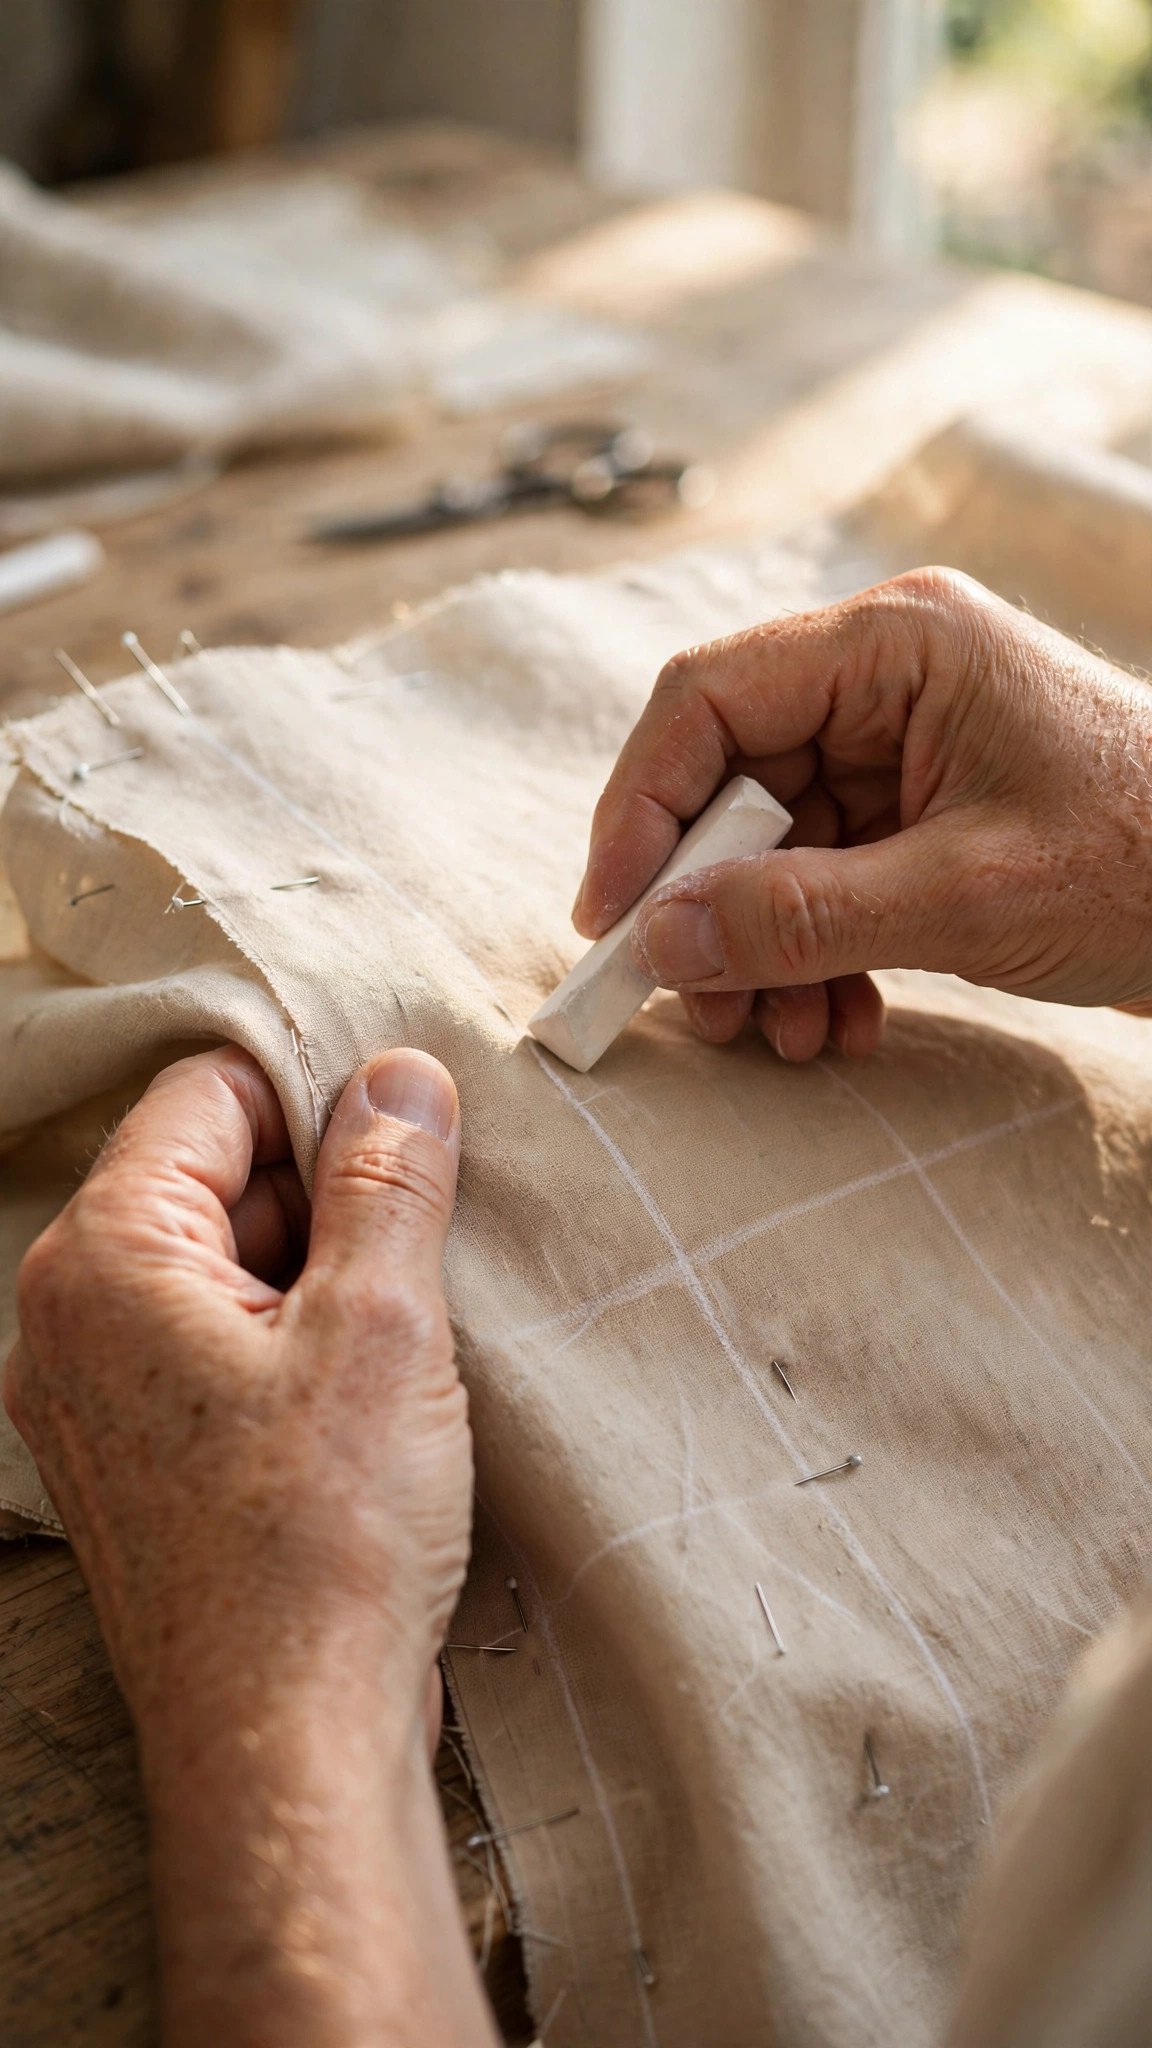
Transfer pattern markings like darts, notches, grainlines, and the bust point to the muslin with tailor’s chalk or a fabric marker. These marks are your roadmap during fitting, so do not skip them. If the symbols confuse you, my guide to reading sewing pattern symbols will decode them. Mark the seam lines too, not just the cutting lines, because fitting happens at the seam line. And double check you are using the right allowance by checking your seam allowance on the pattern before you cut.

How to Make and Fit a Muslin: Baste, Try On, Adjust
Baste muslin together with a long basting stitch, around 4 to 5 mm, which sews fast and rips out easily when you need to adjust. Sew the main seams only, press them open or to one side, and leave closures pinned rather than sewn: safety pins make excellent temporary zippers. Put the muslin on, or better yet, have a friend help you evaluate, because fitting your own back is nearly impossible.
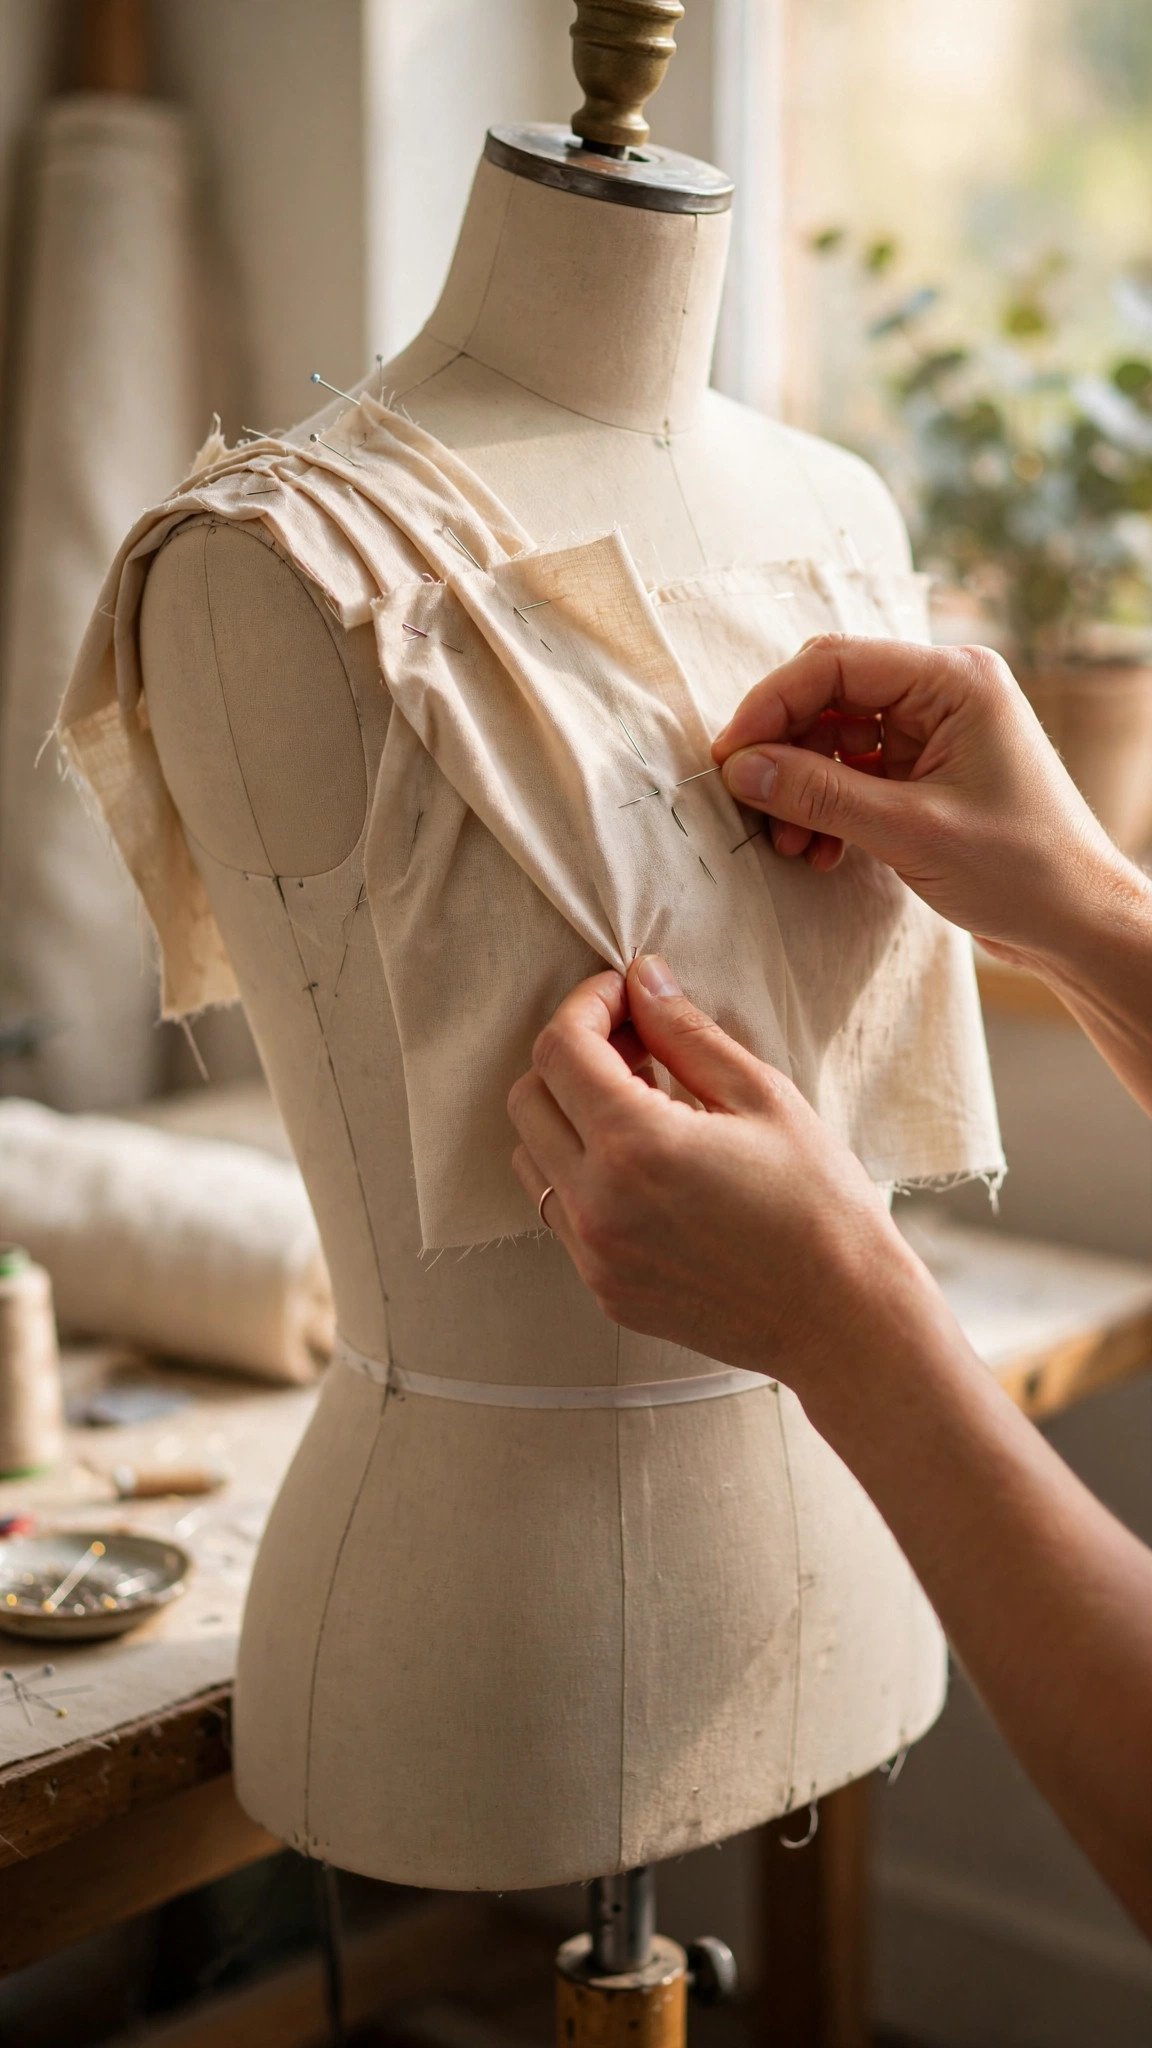
When you fit muslin on body, stand naturally in front of a mirror and look at the whole picture before zooming in. Check the grainline first: if it hangs crooked, something is off in the balance. Look for pulling, gaping, and drag lines, which point straight at the problem areas. Pinch out excess fabric with pins placed along the seam lines, and mark every change with chalk or a pen so you remember what you decided. Take the muslin off, unpick the basted seams you need to change, re-pin, and try it on again. Repeat until it looks right.
Make the Common Adjustments
Most fitting problems fall into a few familiar categories. If the bodice is too short or too long at the waist, use the lengthen or shorten bodice lines printed on the pattern to add or remove length exactly where it belongs. If the bust feels tight or loose, you can test any bust adjustment on muslin before touching your paper pattern: pin the dart deeper or shallower, or slash and spread the front piece, then re-baste and check.
For gaping necklines, pinch out the excess and convert it into a small dart or ease it into the seam. For tight armholes, slash the muslin at the tight spot and let it open until you can move comfortably, then measure the gap and add that amount to the pattern. Work through one area at a time and re-try the muslin after each round of changes. Mark everything: a fitting session you do not mark is a fitting session you will have to repeat.
Transfer Changes and Decide on a Second Muslin
Once the muslin fits, transfer fitting changes to pattern paper while everything is fresh in your mind. Lay each muslin piece over its paper pattern, align the grainlines, and trace the new seam lines, dart positions, and hem. Finally, true pattern pieces so every seam flows in a smooth curve and matching notches still line up. Walk each seam with a ruler to confirm front and back still match in length.
Sometimes one muslin is not enough, and that is completely normal. If you made major changes, especially around the bust, shoulders, or crotch, cut a second muslin to verify the corrected pattern before cutting your fashion fabric. Here is a trick I love: for the second round, cut it from a fabric you would actually wear. A wearable muslin that fits becomes a real garment, so the fitting time never feels wasted.
FAQ
Do I really need to make a muslin for every pattern?
No. Make one for fitted garments, expensive fabrics, and patterns you have never sewn. For a loose tunic you have made before, your experience is muslin enough.
What fabric should I use for a muslin?
Plain cotton muslin in a weight similar to your final fabric. The closer the muslin behaves to your fashion fabric, the more you can trust the fitting.
Can I skip the muslin if I am between sizes?
This is exactly when you need it most. Cut the larger size in muslin, pin out the excess during fitting, and you will know precisely how to blend between the sizes on your pattern.
How many muslins should I make?
Usually one, sometimes two. If the first muslin needed only small tweaks, cut your fashion fabric with confidence. If you rebuilt half the bodice, verify with a second muslin first.

Written by June Carter
I am June, a sewing enthusiast who loves turning simple fabric into things people actually use. I test every technique and product I write about at my own machine before it lands here.