

The short version
Here is how to clean lint out of your sewing machine in about three minutes. Unplug it. Remove the bobbin, the needle plate, and the bobbin case. Brush out every bit of lint you can see from the bobbin area, the feed dogs, and under the plate. Floss the tension discs with a folded strip of scrap fabric. Put everything back, rethread, and sew a test line on a scrap. Do this after every project and your machine will mystify you with its reliability.
Lint is the quiet saboteur of sewing machines. Every yard of thread sheds tiny fibers, and they pack into places you never look until something goes wrong. A surprising number of “my machine is broken” moments are just lint, and the fix costs nothing and takes less time than brewing coffee. I clean mine after every project, and my machine has never once surprised me mid-seam.
Why lint is the enemy
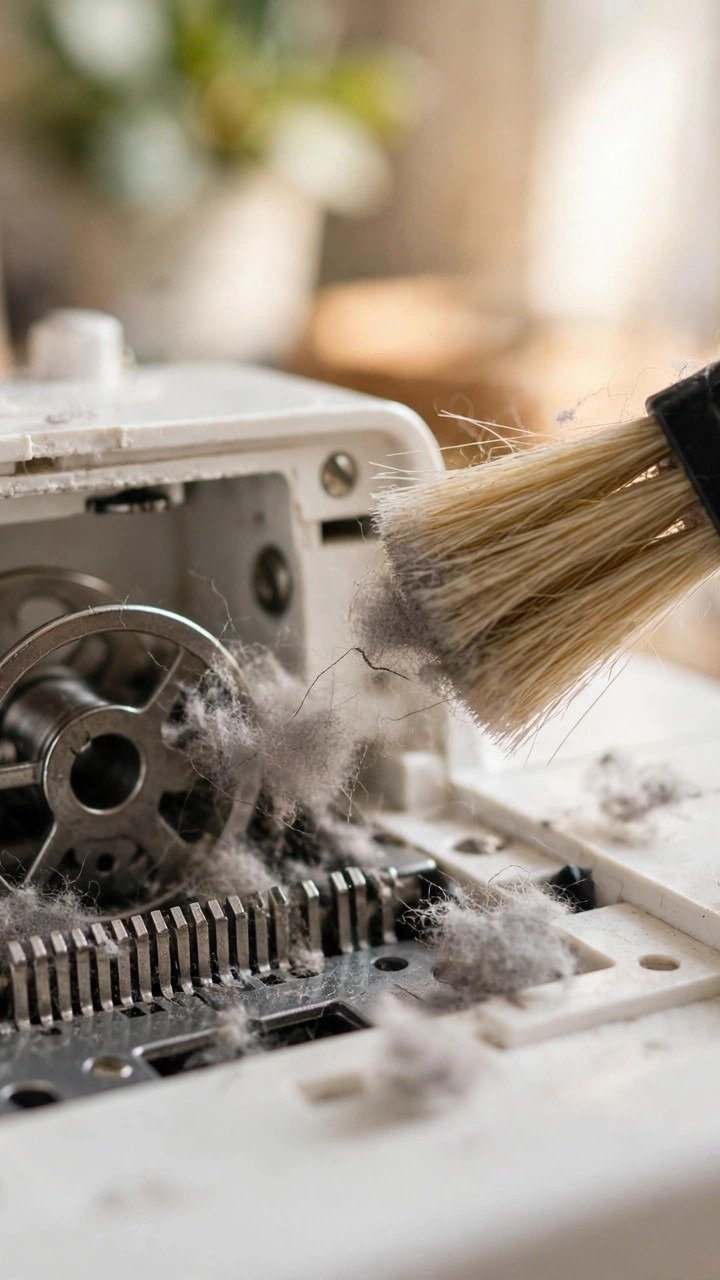
To understand why lint matters, picture what is happening under the needle plate. The bobbin case sits in a precisely machined track called the race, with clearances measured in fractions of a millimeter. The feed dogs rise through slots in the plate to grip your fabric. The tension discs squeeze the top thread with calibrated pressure. Now pack all of that with felted thread fibers.
Lint under the bobbin case lifts it microscopically, which changes the thread tension in ways that look exactly like a tension problem but are not. Lint packed around the feed dogs stops them gripping, so the fabric feeds unevenly and your seams wander. Lint in the tension discs keeps them from closing fully, so the top thread runs too loose no matter where you set the dial. And a big enough wad in the hook area will jam the machine outright, usually ten minutes before a deadline.
The maddening part is that lint problems mimic every other problem on the machine. Bad tension? Could be lint. Skipped stitches? Could be lint. Thread nesting underneath? Could be lint. Which is why cleaning is step zero of all troubleshooting: rule out the free fix before you touch a single dial.
What you need (and what to avoid)
The good news is you probably own most of this already.
- The lint brush that came with your machine. That funny little double-ended brush in the accessory box is not a decoration. The bristle end sweeps lint out of the bobbin area, and the pointed end digs it out from around the feed dogs. If yours vanished years ago, a small clean paintbrush or a cheap makeup brush does the same job.
- Tweezers. For the thread nests and felted wads that the brush just pushes around. The slanted cosmetic kind works fine.
- A small screwdriver. Your machine’s needle plate is held by one or two screws, and the included screwdriver fits them. A bit of masking tape on the screwdriver shaft keeps you from scratching the plate.
- Pipe cleaners. The unsung hero. They bend into the curved corners of the bobbin area that no brush reaches.
- Optional: a mini vacuum attachment. Those tiny vacuum nozzles made for keyboards work beautifully for sucking loose lint out of the bobbin well. Optional, not essential.
And the do-not-use list, which matters more: no canned air. It blasts lint deeper into the machine instead of removing it, and the propellant can leave residue on sensors and electronics. Do not blow with your mouth, because breath carries moisture straight into the works. And no cotton swabs that shed: a disintegrating swab just trades one lint for another. Pipe cleaners do not shed, which is why they made my list.
If you want it all in one place, a little 21-piece sewing machine cleaning kit with the double-ended brush, tweezers, and screwdrivers lives next to my machine and costs less than a single spool of good thread.
Step 1: Power off and clear the deck
Unplug the machine. Not just switched off, unplugged. You are about to put fingers and tools near the needle bar, and a bumped foot pedal is all it takes to ruin your afternoon. Remove the needle (loosen the clamp screw and slide it out) and take off the presser foot. This is not strictly required, but it gives you room to see and work, and it takes twenty seconds.
Pull out the bobbin and set it aside. If your machine is a top drop-in style, slide off the bobbin cover plate. If it is a front-loading machine with a removable bobbin case, lift the case out too, noting how it sits so it goes back the same way. Take a phone photo if this is your first time. There is no shame in it; I still photograph anything I disassemble.
Step 2: The bobbin area
This is where the majority of the lint lives, so spend most of your three minutes here. With the bobbin case out, look into the well. You will see gray felted buildup around the circular race, the track the case rides in, and probably a small archaeology of thread colors from past projects.
Brush everything out with the lint brush, working from the center outward so you are moving lint out of the machine, not deeper into it. Get under the rim of the race and around the hook, the pointed piece that swings around to catch the thread. Use the tweezers for any felted wads and the pipe cleaner for the curved corners. Turn the handwheel toward you slowly while you work; it rotates the hook and exposes lint hiding behind it.
Look specifically for thread wrapped around the hook shaft. A single strand wound tight around the shaft can cause intermittent jams that come and go mysteriously. Tweezers and patience get it off. If you find a genuine nest, a solid clump of tangled thread, remove it whole rather than picking at it, because fragments left behind just start the next nest.
Step 3: Under the needle plate
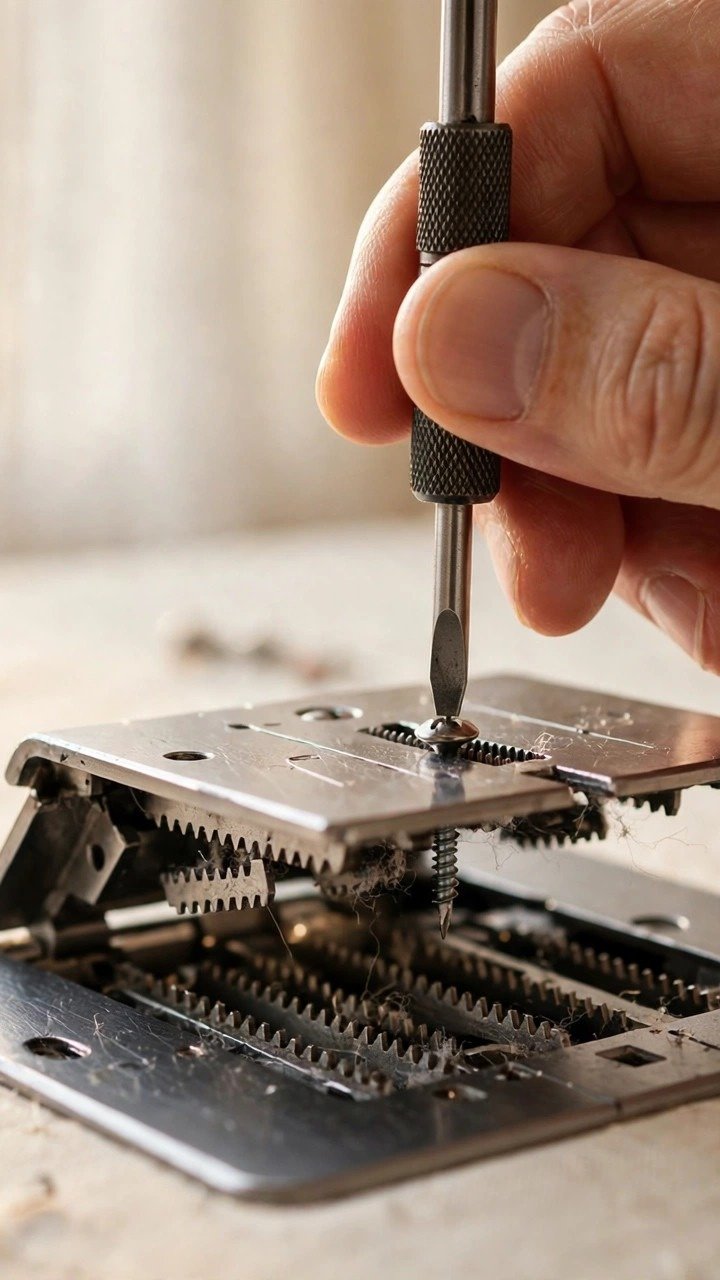
The needle plate is the metal plate the needle passes through, held by one or two screws. Remove the screws (put them somewhere they cannot roll away; a little magnetic dish is perfect, or just a folded piece of tape, sticky side up) and lift the plate off.
Underneath you will find the feed dogs, those rows of little teeth that move your fabric, usually packed with lint between the teeth. This is the lint that causes uneven feeding, the kind where one layer of fabric creeps ahead of the other. Brush between every row of teeth with the pointed end of the brush, then run a pipe cleaner along the slots. You will be slightly horrified at how much comes out. Everyone is, the first time.
While the plate is off, brush the whole exposed area, including the underside of the plate itself. Check that the feed dogs move freely when you turn the handwheel. Then replace the plate and screws, snug but not gorilla-tight. Overtightened plate screws can warp a thin plate just enough to matter.
Step 4: Floss the tension discs
The top tension discs hide inside the machine where you cannot see them, but lint gets in there too, riding in on the thread. Here is the trick: raise the presser foot, which opens the discs, and unthread the machine completely. Fold a strip of scrap muslin into a narrow band, or use a length of unwaxed dental floss, and work it back and forth through the tension disc area the way you would floss teeth. You are scrubbing lint out from between the discs.
Do this a few times, then rethread the machine from scratch following your normal path. My threading walkthrough covers the full route if you want to be careful about it. After any deep clean, always rethread both top and bobbin: cleaning disturbs the thread path, and a fresh, correct threading is part of the job.
Step 5: Reassemble and prove it
Put the bobbin case back exactly as it came out, drop in the bobbin, replace the cover, reinstall the needle (flat side of the shank to the back, pushed all the way up), and reattach the presser foot. Plug the machine back in.
Now sew a test line on a scrap of real fabric, not paper, and look at both sides of the seam. You are checking for even, balanced stitches with no loops top or bottom. If the machine was acting up before the cleaning, this is the moment of truth. In my experience, roughly two out of three “mystery problems” vanish right here, which is a remarkable return on three minutes with a brush.

Three things to never do
Never use canned or compressed air. I said it before and I am saying it again because it is the most common bad advice on the internet. The blast drives lint deeper into the machine, past the point where a brush can reach it, and the chemical propellant can damage sensors on computerized machines. Brushes remove lint. Air relocates it.
Never oil unless your manual says to, and never over-oil. Many modern machines are designed to run without user oiling, and oil in the wrong place attracts lint and turns into grinding paste. If your manual specifies oiling points, use one drop of proper sewing machine oil, not 3-in-1, not WD-40, not cooking oil. If the manual says nothing about oiling, do not invent the step.
Never poke at the timing or internal screws. Cleaning means the accessible areas: bobbin well, under the plate, feed dogs, tension discs, face plate if your manual shows you how. The screws that hold the needle bar and hook assembly in alignment are not cleaning access, and loosening them turns a three-minute maintenance into a service bill.
How often: the maintenance schedule
After every project: the three-minute brush-out described above. Bobbin area, feed dogs, tension disc floss. This is the habit that prevents 90 percent of lint problems.
Every 6 to 8 hours of sewing: the deeper version, with the needle plate off. Change the needle at the same time and you have a proper little service ritual.
When sewing lint-heavy fabrics: flannel, fleece, minky, chenille, and anything fuzzy shed dramatically more lint than quilting cotton. Clean mid-project if you are sewing yards of the stuff. And consider your thread: cheap, fuzzy thread sheds far more lint than a smooth low-lint thread, which is one more reason I stick with decent thread, as I explain in my best thread for sewing machines guide.
Once a year (or every couple of years): a professional service. A technician opens what you should not, checks the timing, and gives the machine the deep clean it cannot give itself. Think of it like a dental checkup: the daily brushing is yours, the deep clean is theirs.
Frequently asked questions
Can I use a vacuum instead of a brush?
Yes, a small vacuum with a micro attachment is great for lifting loose lint out of the bobbin well. Use it to remove, not to blow. And never use a full-size household vacuum hose directly on the machine; the suction is strong enough to disturb small parts.
My machine’s manual says never to oil it. Is that right?
Probably. Most modern computerized machines have sealed or self-lubricating mechanisms and the manufacturer means it. Follow your manual, not internet advice. Vintage all-metal machines are the ones that typically want regular oiling.
How do I get lint out from between the feed dog teeth properly?
The pointed end of the lint brush, worked along each row, then a pipe cleaner dragged through the slots. If the buildup is felted solid, tweezers to lift the mat out in one piece. Do not scrape with anything metal and sharp; the feed dogs are precisely machined.
There is thread wrapped tightly around the hook shaft. Help.
Tweezers, good light, and patience. Work the end of the thread free and unwind it rather than cutting, because a cut fragment left behind starts the next tangle. Turn the handwheel slowly to rotate the shaft as you work. If it will not budge, that is a job for a technician, not for force.
Should I clean the top of the machine too?
A quick wipe of the exterior with a soft dry cloth keeps dust from migrating inside. Keep the machine covered when you are not using it; a pillowcase works fine and costs nothing. Dust settling on the machine eventually becomes dust inside the machine.
Three minutes that save three hours
Every troubleshooting guide ever written should start with “clean the lint out first,” because it resolves an absurd share of problems for zero dollars. Make it a ritual: project done, brush out the machine, fresh needle in, ready for the next one. Your machine will repay you with years of boring, reliable, wonderful stitching, and boring reliability is the highest compliment a sewing machine can earn.

Written by June Carter
I am June, a sewing enthusiast who loves turning simple fabric into things people actually use. I test every technique and product I write about at my own machine before it lands here.