

Learning how to set in sleeves was the scariest skill of my first sewing year. I dodged it for months, sewing nothing but sleeveless tops and raglan hoodies, because every tutorial made it sound like brain surgery performed on fabric. Here is what I wish someone had told me back then: setting in a sleeve is mostly careful pinning plus one slow trip around the machine. The sleeve cap looks bigger than the armhole on purpose, and once you understand why, the whole thing clicks.
I have set sleeves into everything from a crisp quilting cotton camp shirt to a drapey rayon blouse that fought me at every single curve, and the method below is the one I come back to every time. It is slow, it is fussy, and it works. If you can pin fabric together, you can do this.
What “Setting In a Sleeve” Actually Means
A set-in sleeve is sewn separately from the bodice and then joined at the armhole, so the seam circles your shoulder like a halo. The sleeve cap, the curved top of the sleeve piece, is deliberately cut larger than the armhole opening. That built-in fullness is called sleeve cap ease, and it is what gives your shoulder its smooth, rounded shape instead of a flat, tent-like join.
New sewists panic here because the pieces do not match up edge to edge. They are not supposed to. Your job is to distribute that extra cap fullness evenly around the armhole so it disappears into the seam. No tucks, no pleats, just a gentle, invisible spreading of fabric. Every technique in this guide exists to help you do exactly that.
Prep Work: Stay Stitch, Mark Notches, Sew the Underarm
Rushing the prep is how sleeve disasters start, so give this stage the full ten minutes it deserves. First, stay stitch the armhole. Right after cutting your bodice pieces, run a line of regular stitching just inside the seam line (about 1/4 inch from the raw edge) around each armhole curve. Stay stitching keeps the bias sections of the armhole from stretching out while you handle them, and a stretched armhole is nearly impossible to set a sleeve into cleanly.
Next, transfer every marking. Your pattern has notches for a reason, and sleeve notches are the map for this whole operation. Snip them outward into the seam allowance so they survive handling: a single notch marks the front, a double notch marks the back, and the top notch at the peak of the cap lines up with the shoulder seam. If notch symbols still confuse you, my walkthrough on how to read your pattern’s notch symbols will sort you out before you cut.
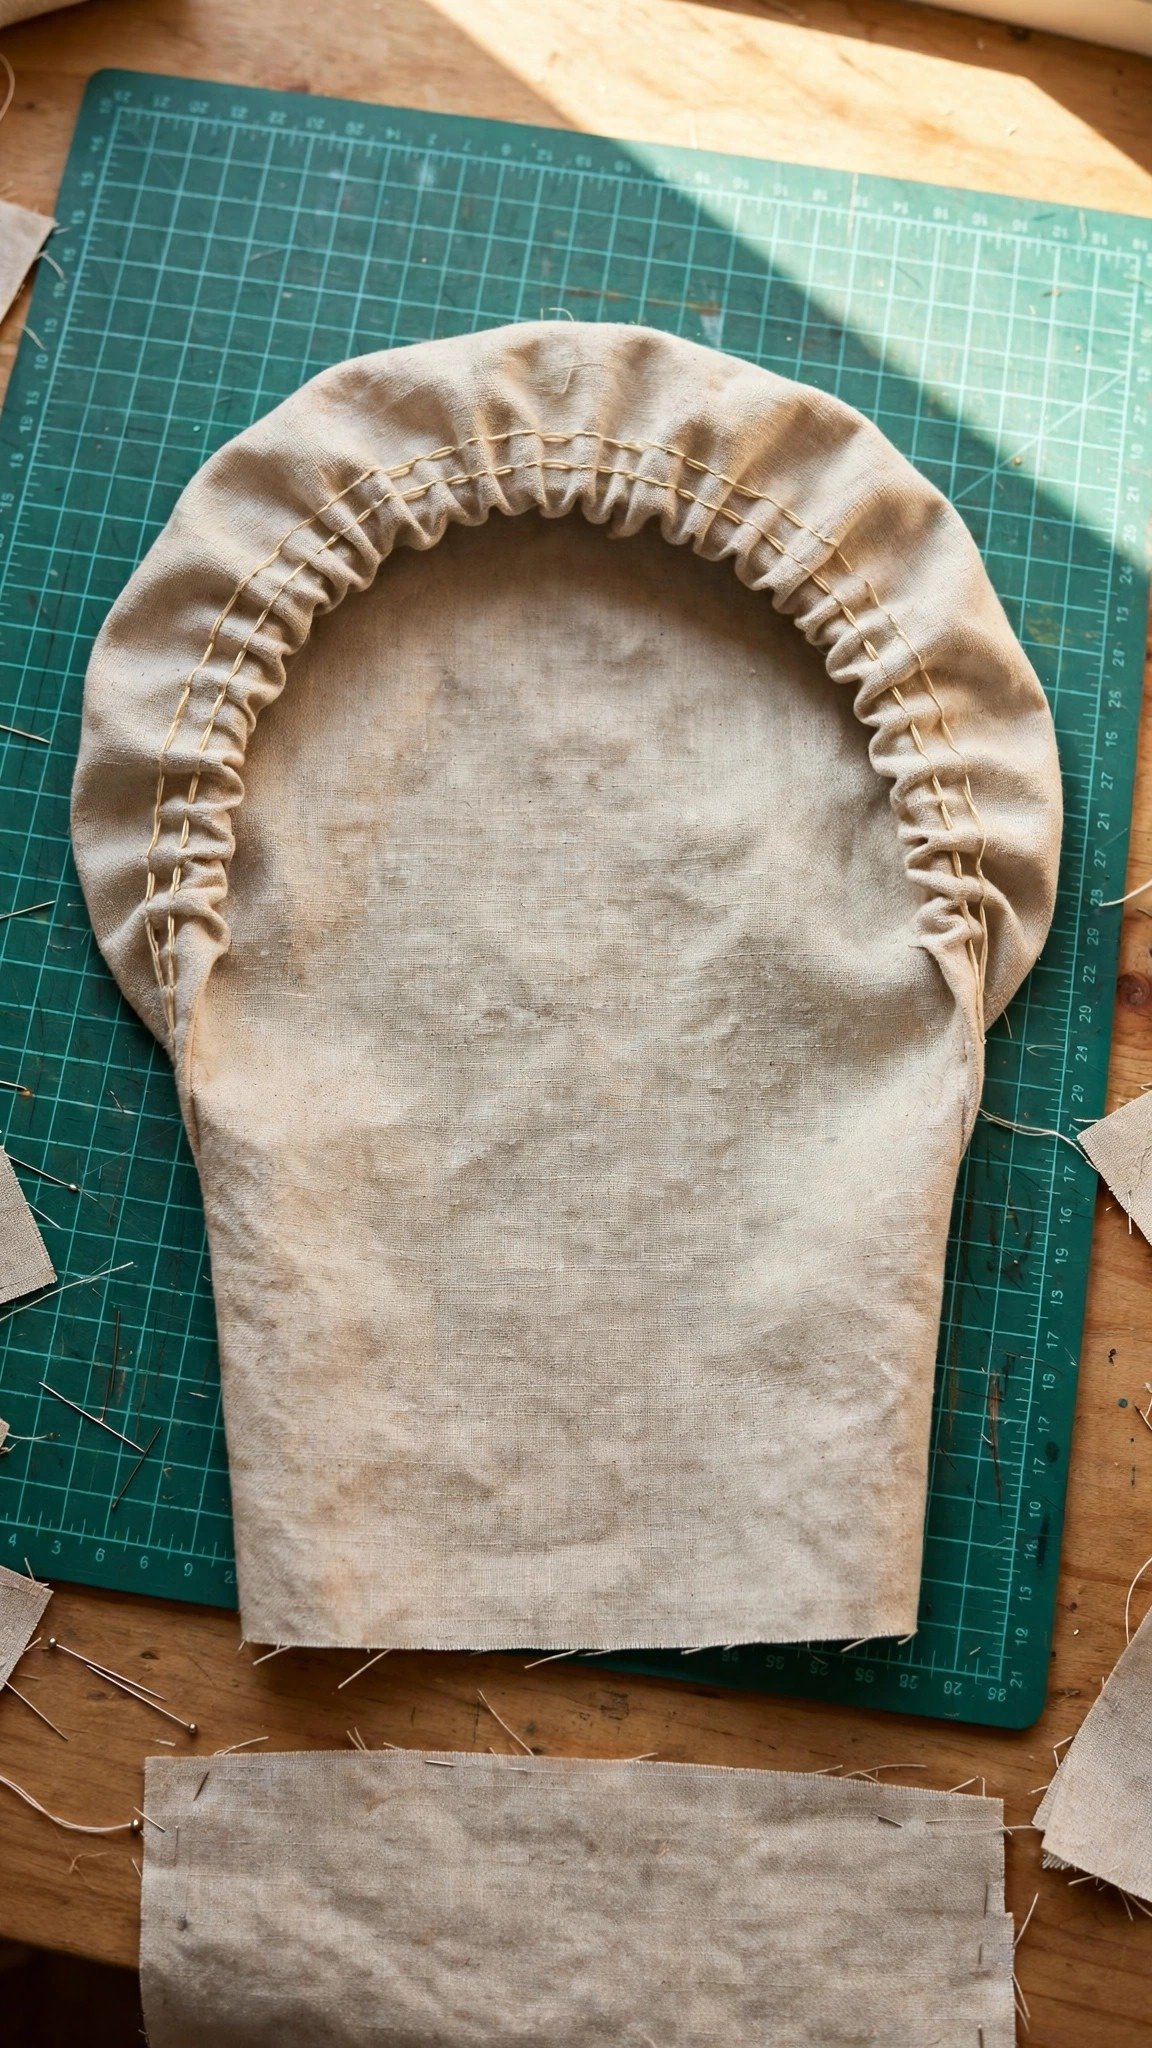
Now sew the sleeve’s underarm seam with right sides together at your pattern’s seam allowance, finish the raw edges however you like, and press the seam toward the back of the sleeve. Finally, run two rows of long easing stitches along the sleeve cap between the small dots or circles your pattern printed. Place one row at 3/8 inch and the second at 5/8 inch from the raw edge, leave long thread tails at both ends, and do not backstitch. These basting rows are the reins you will use to gather the cap’s fullness exactly where you want it.
How to Set In Sleeves, Step by Step
Here is the pinning order I use on every garment, and I recommend you memorize it because it never changes. Turn the bodice wrong side out and keep the sleeve right side out, then slip the sleeve up inside the armhole so right sides are together.
Start with the anchor points. Match the sleeve’s underarm seam to the bodice side seam and pin. Then match the single front notch to the front armhole notch and pin, the double back notches to the back and pin, and finally the top cap notch to the shoulder seam and pin. Good notch matching does half the easing work for you, because the fullness is already roughly assigned to the right zones: most of it belongs across the top of the cap, very little down near the underarm.
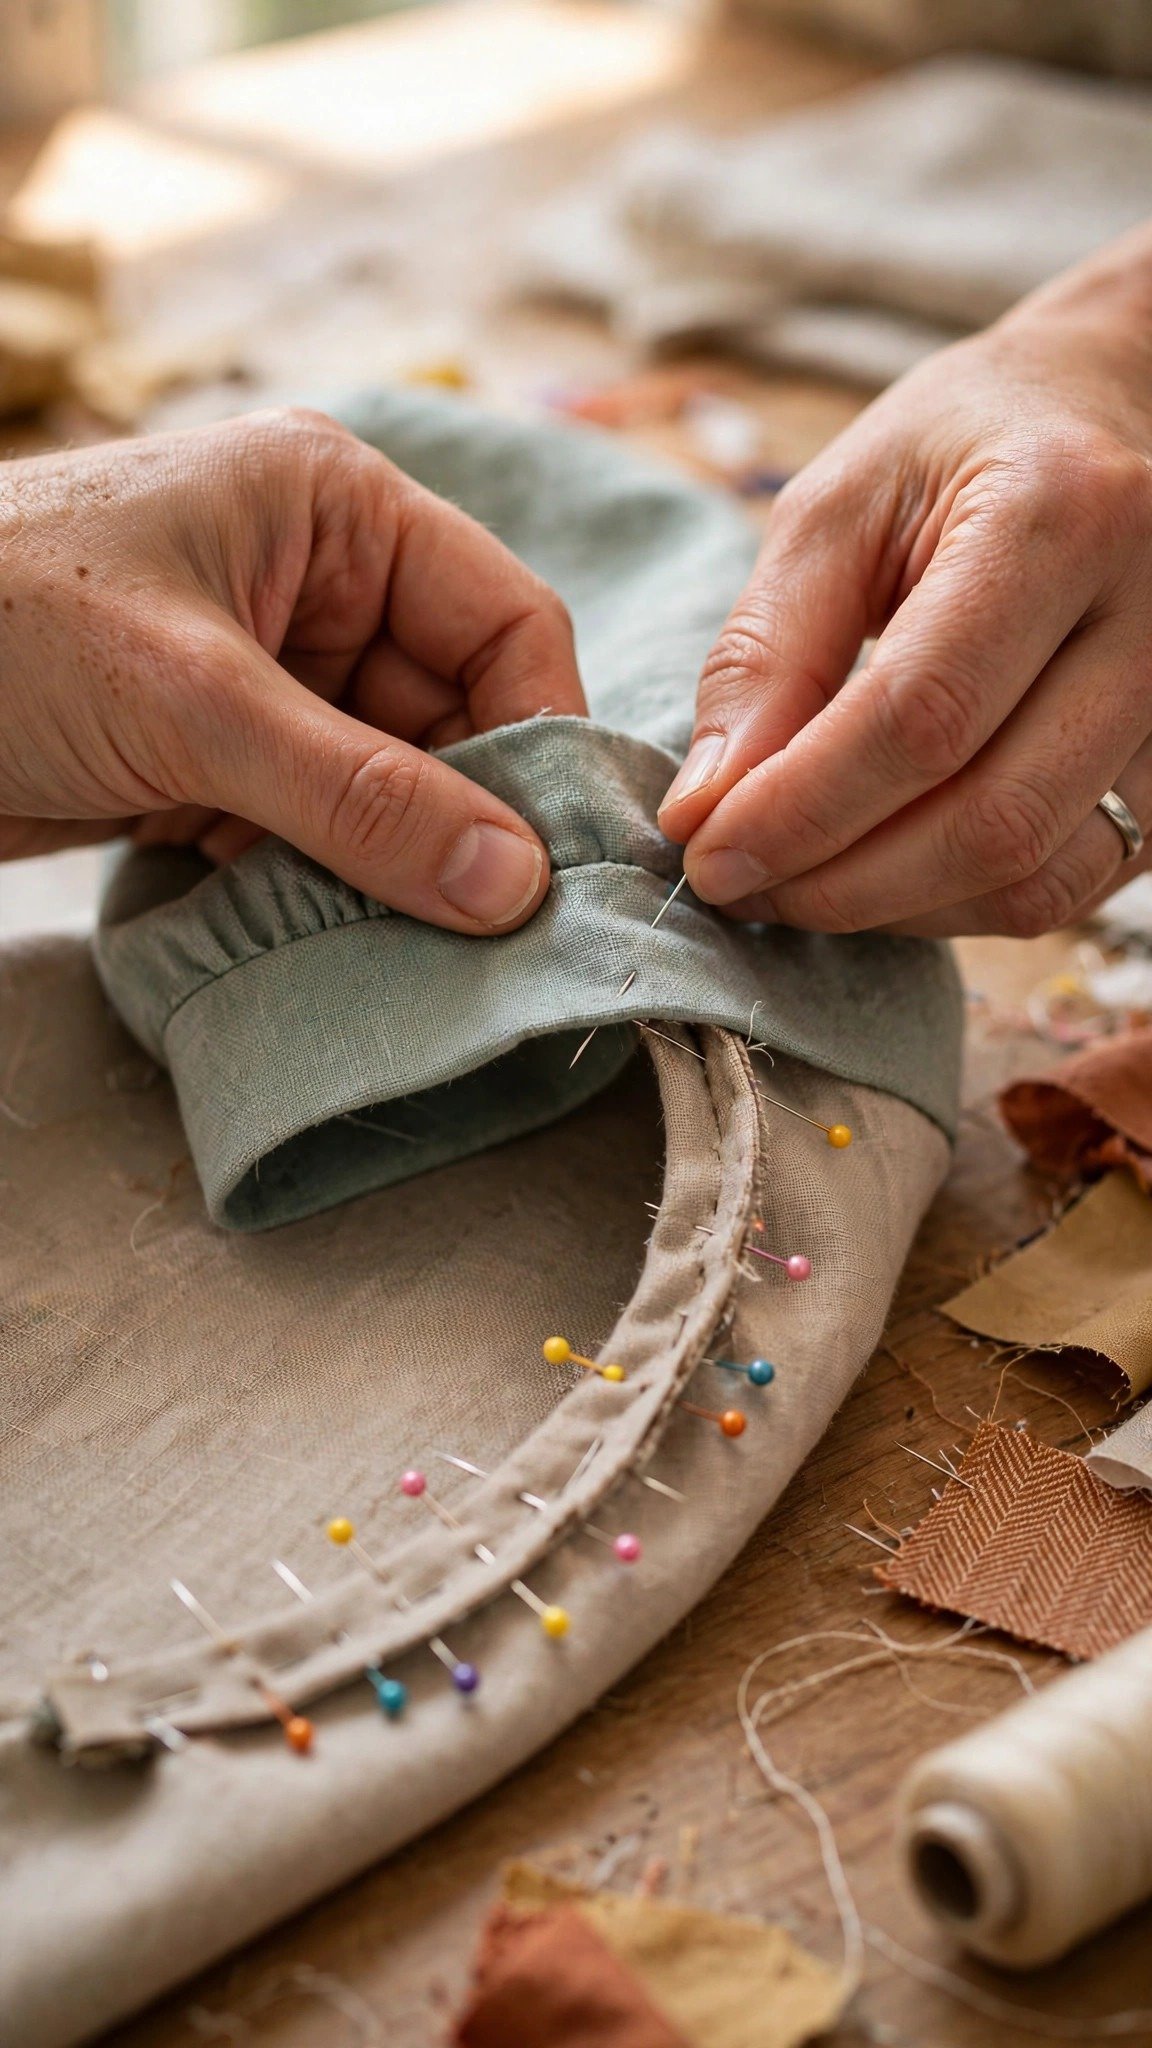
Now gently pull the bobbin tails of your basting rows to draw the cap up until it fits the armhole, and distribute the fullness evenly with your fingers. Pin like you mean it. I place a pin every inch or so around the cap, with the pins pointing along the stitching line so I can sew right over them or pull them at the last second. When pinning the sleeve to the armhole, check from the right side that no fold or tuck has snuck in. If you are nervous, hand baste the whole thing first. A quick refresher on basting by hand takes five minutes and can save an hour of unpicking later.
Easing the Cap Without Puckers
Easing a sleeve cap is a different move from gathering. You are not creating ruffles, you are persuading a longer edge to fit a shorter one with zero visible folds. Work in small sections, about two inches at a time. Hold the fabric on either side of your presser foot and use your fingertips to coax the tiniest bit of extra cap fabric forward as you sew, smoothing it flat just before the needle arrives.
My strongest opinion on this topic: sew with the sleeve side down, cap against the feed dogs. The feed dogs naturally help ease in the fuller layer while the presser foot holds the armhole layer steady, which is exactly the direction of help you want. Keep one fingertip riding lightly along the stitching line just behind the needle so you can feel a pleat forming before you sew over it. If you feel one, stop with the needle down, lift the presser foot, smooth the fabric flat, and continue. A puckered sleeve cap almost always comes from sewing too fast through a section instead of stopping to redistribute.
Stitching the Sleeve Seam For Real
With everything pinned, stitch the sleeve seam at your pattern’s seam allowance, usually 5/8 inch, sewing right between your two rows of basting stitches. Go slowly around the curves and stop with the needle down whenever you need to pivot or adjust the fullness. This is not the moment for speed; if you need a confidence boost on machine control first, practice sewing a straight stitch on scraps until slow, steady curves feel natural.
When you want to sew a sleeve into an armhole cleanly, the real test happens after stitching: turn the garment right side out and inspect the cap from the outside. Run your eye slowly around the whole curve. You are looking for smooth fabric with no pinches. Flip it inside and check the seam line too. Only when both sides look clean should you remove the basting rows, pulling the bobbin threads gently so they slide out without distorting the seam.
Finishing, Pressing, and the Final Fit Check
Finish the sleeve seam allowances together with a serger, a zigzag stitch, or your preferred method, then press. I press the seam allowance toward the sleeve, which is the convention for most garments. Never press the cap flat like a pancake, because you will crush the rounded shape you just worked to create. A sleeve board is the ideal tool, but a tightly rolled towel stuffed into the sleeve works beautifully as a pressing ham in a pinch. Give the cap a good burst of steam and let it cool completely before moving the garment.
Now try it on. The cap should sit smoothly over your shoulder with the top notch sitting right at your shoulder point. Walk through this checklist: is the fullness evenly distributed with no tucks, does the underarm feel comfortable with no pulling, and does the sleeve hang straight without twisting? A twisted sleeve usually means the front and back notches got swapped, which is a pinning error, not a sewing failure. If the shoulder itself feels off, the issue may be sizing rather than technique, so double-check with how to take accurate body measurements before you blame your stitching.

FAQ
Why is my sleeve cap bigger than the armhole?
That is the sleeve cap ease, and it is intentional. The extra length shapes over the curve of your shoulder. Ease it in evenly with your basting rows and fingertip control, and it will disappear into the seam.
Can I skip the basting ease rows?
You can, but I do not recommend it. Those two rows of gathering stitches give you precise control over where the fullness goes. Skipping them is the fastest route to a puckered cap and a date with your seam ripper.
Should I sew the sleeve in flat or in the round?
Both methods exist, but for classic shirts, blouses, and dresses I always sew the underarm seam first and set the closed sleeve into the finished armhole. It gives you the most control over the cap, which is the whole battle.
How do I fix sleeve puckers without starting over?
To fix sleeve puckers, unpick just the puckered section, about two inches on either side. Re-run your easing stitches if they got mangled, redistribute the fullness with your fingers, re-pin generously, and restitch slowly. Small puckers almost never require removing the entire sleeve.

Written by June Carter
I am June, a sewing enthusiast who loves turning simple fabric into things people actually use. I test every technique and product I write about at my own machine before it lands here.